
Most guitarists think they know how to use a delay pedal. Set the time, adjust the mix, maybe tweak the feedback.
Easy. Right?
But here’s the thing that drove me crazy for years: Delay pedals can do way more than just echo your notes back at you.
I’m talking about techniques that completely transform how you approach the guitar. Not just making your solos sound bigger or adding some vintage slap to your rhythm parts. I’m talking about using delay as a compositional tool, a rhythm generator, even a way to create sounds that don’t exist anywhere else in your mix.
Over the next few minutes, I’m going to show you five delay techniques that go far beyond basic echo. We’ll explore how poly-rhythmic patterns can turn your Timeline into a drum machine. How reverse delays can create orchestral swells that sound like angels. How micro-timing adjustments can make your funk chops cut through like Nile Rodgers himself is in the room.
Each technique comes with specific settings you can dial in immediately. I’ve tested these on everything from practice sessions in my kitchen to live gigs, and I’ll tell you exactly what works and what doesn’t.
The best part? You probably already own a delay pedal that can do at least three of these techniques. You just haven’t unlocked its potential yet.
1. Reverse Delay for Cinematic Swells
Ever hit a chord and wished it could swell and grow like a movie soundtrack? I know I have.
Most guitarists discover reverse delay by accident, usually through pedal menu diving. They hit a switch, play a note, and suddenly they’re living in a Christopher Nolan film.
But the trick isn’t just turning on the reverse mode. It’s understanding how to make it musical.
Here’s a great video demonstrating the reverse delay capabilities of the Strymon Timeline.
The Physics Behind the Magic
Here’s what’s actually happening when you use reverse delay.
Your pedal captures your playing in real-time, then plays it back in reverse after a set delay time. The Strymon Timeline’s Reverse algorithm does this perfectly at 100% wet mix with zero feedback for authentic backwards effects.
I set my Timeline to 500ms delay time to capture two-bar phrases perfectly. This timing is crucial. Too short and you only get reversed fragments. Too long and the effect becomes disconnected from your playing.
Creating Film-Like Textures
The secret to cinematic swells lies in combining reverse delay with volume control. Here’s my go-to technique:
Start with your volume pedal at zero. Play a chord or sustained note. As the reverse delay kicks in, slowly bring up your volume pedal. The reversed signal creates an anticipatory build while your forward signal provides the payoff. It’s like scoring your own soundtrack in real-time.
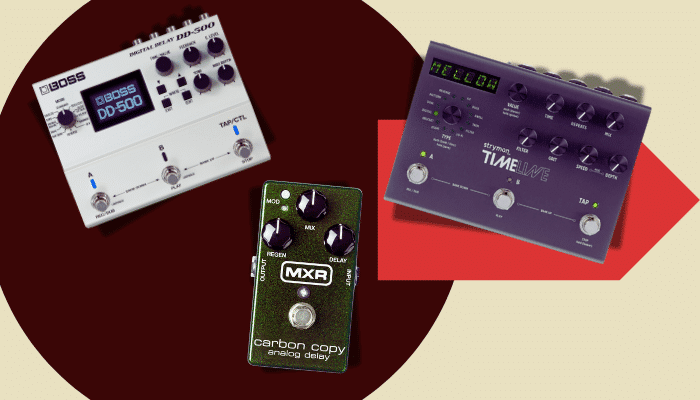
The Boss DD-500’s reverse modes offer similar capabilities with added flexibility. I particularly love the Tera Echo mode combined with reverse settings. Set it to 110ms with 2 repeats, and you get stuttering reverse fragments that feel like time glitching.
Settings That Actually Work
For sweeping cinematic builds, I use these specific settings on the Timeline:
- Delay Time: 500ms (captures 2-bar phrases)
- Mix: 100% (pure reverse effect)
- Feedback: 0% (prevents runaway loops)
- Filter: Low-pass at 5kHz (removes harsh digital artifacts)
The Timeline’s Swell algorithm takes this further. Set the attack time to 500ms and the decay time to 1 second. This emulates the way reversed tape naturally decays, creating that authentic vintage film sound.
Common Mistakes and Quick Fixes
Most guitarists make reverse delay too prominent in the mix. Remember, cinema uses these effects subtly. Keep your mix around 40-50% for musical applications, not 100%.
Another pitfall is ignoring the pre-delay timing. If your reverse effects feel disconnected, adjust your delay time to match your playing tempo. Quarter note delays work for ballads, eighth notes for uptempo pieces.
But the biggest mistake I see. Or hear…
Players using lots of feedback with reverse delay. This creates a chaotic buildup that sounds amateur (if chaos is not your intention). Keep feedback low and let the reverse effect breathe.
Your reverse delay doesn’t need to scream “look at me.” The best cinematic guitar sounds support the music, not overshadow it. Trust your ears over your eyes when dialing in these effects.
2. Tape Delay as a Rhythmic Partner
Your rhythm guitar already has groove. But what if those chord hits could bounce back and lock into the beat like a second guitarist playing along?
Tape delay isn’t just about adding space. It’s about creating rhythmic conversations between your playing and the echoes that come back. When you nail the timing, those delayed repeats become part of the groove itself.

The Magic of Dotted Eighth Patterns
Here’s where things get interesting. Most guitarists think delay means quarter notes. But dotted eighth delays create something special.
Set your delay to dotted eighth notes and suddenly your single chord stabs become triplet feels. Play a chord on beat one, and the delay comes back right before beat two. This creates that infectious “skip” that makes listeners want to move.
I use my trusty MXR Carbon Copy (okay, not technically a tape delay) set to around 12 o’clock with 40% feedback for this. The analog warmth keeps those repeats musical, never harsh. When you’re playing in a band context, that natural frequency roll-off prevents the delays from fighting with the bass and drums.
Locking Delay to Song Tempo
The secret is mathematical precision disguised as feel. For a 120 BPM song, your dotted eighth delay should be exactly 375ms. But here’s the thing. You don’t need to calculate this every time.
Start with your delay around 350ms and tap your foot to the song. If the delays feel rushed, increase the time slightly. If they drag, decrease it. Your ear will tell you when it locks in perfectly.
For live situations, I keep the Carbon Copy’s modulation completely off. You want those rhythmic echoes to be rock solid, not wobbly. Save the modulation for solos where that analog chorus effect adds character.
Some digital tape emulations like the Boss DD-500 offer tempo sync if you need precision. But honestly, the slight human element of manually setting analog delays often feels more musical to me.
Your rhythm playing transforms when delay becomes your rhythmic partner instead of just an effect.

3. Dual Delay for Stereo Soundscapes
Your guitar sound can suddenly become three-dimensional with the right stereo delay approach. Most guitarists stick with mono delays and never realize how much sonic space they’re missing.
Here’s what transforms your sound from flat to immersive: dual delay engines running different times to opposite sides of your signal path.
The Boss DD-500, Strymon Timeline, Meris LVX, plus many more make this incredibly simple with their dual delay engines. You can set up completely independent delays for the left and right channels. I usually start with Delay A at 400ms, panned left, and Delay B at 600ms, panned right. This creates a wide, rhythmic ping-pong effect as the repeats bounce back and forth.
The key is using different delay times rather than identical ones. When both delays use the same timing, you get stronger center-focused repeats. When they’re different, the delays create movement and width that makes your guitar sound like it’s floating in space.

Setting Up Your Stereo Delay Chain
For the DD-500 (or any dual-delay unit), engage Dual mode and set the Output to Stereo. I like to use Digital on both engines for pristine clarity. Set your left delay to 350ms with 35% feedback, and your right to 550ms with 30% feedback. This slight difference in feedback prevents the delays from building up too evenly.
The real magic happens with the high-pass filter. Set it around 800Hz to prevent those muddy low-mid frequencies from cluttering your stereo field. This keeps your delays bright and spacious rather than thick and muddy.
Two-Pedal Alternative Setup
Don’t have a dual delay pedal? No problem. Run two separate delay pedals in parallel using a splitter or your amp’s effects loop send to two different delays. Route one pedal to your left output and one to your right.
This actually gives you more control. You can use different pedal types for each side. Try a digital delay left and analog delay right for interesting texture contrasts.
The stereo imaging technique works because your ears interpret the time differences as spatial information. Your guitar transforms from a point source to a wide soundscape that envelops listeners.

4. Micro Delays for Thickening Tone
Your guitar doesn’t need to sound thin anymore. Most guitarists think delay is only for echo-laden solos, but here’s the truth:
Micro delays are the absolute best tool for thickening your tone without making it sound processed.
The Magic of Micro Timing
Think of micro delays as your guitar’s shadow. You set extremely short delay times between 10-50ms with minimal feedback to create an instant doubling effect. It’s like having a second guitarist playing exactly what you’re playing, just milliseconds behind you.
I typically start with 25-30ms delay time and about 30% mix. This gives you that immediate thickness without any obvious “delay” sound. The Strymon Timeline excels here because its precise timing control lets you dial in exactly 28ms when you need it. Personally, I use my Meris LVX for this.
Avoiding the Flanging Trap
Here’s where most players mess up:
They set the delay time too short. Anything under 20ms starts creating phasing issues that sound like a cheap flanger. You want doubling, not swooshing.
The sweet spot is 25-40ms for most situations. At 25ms, you get subtle thickness. At 35ms, you get noticeable doubling without the flange. At 40ms, you’re just starting to hear two distinct notes.
EQ Considerations for Clarity
Raw micro delays can muddy your low end fast. I always high-pass filter my delay signal around 250-400Hz to keep the bottom tight. This prevents that woolly, unfocused sound that kills your clarity in a mix.
Most delay pedals don’t have built-in EQ, so you might need to place an EQ after your delay. But the Timeline’s tone controls work perfectly for this. Cut the low end slightly and add a touch of high-end sparkle around 3-5kHz.
This technique transforms thin single-coil pickups into thick, studio-quality tones. You’ll sound bigger immediately, and your bandmates will wonder what expensive amp you bought.
5. Self-Oscillating Delay for Sound Design
Ever wanted to push a delay pedal past its breaking point? Self-oscillating delay isn’t your typical echo effect. It’s the sound of feedback running wild, creating everything from subtle swells to complete sonic chaos.
Most guitarists accidentally stumble into oscillation when they turn the feedback knob too high. That runaway squeal can be terrifying the first time it happens. But that “mistake” is actually one of the most powerful sound design tools you have.
Creating Controlled Chaos
The key to musical self-oscillation lies in the feedback control. On the MXR Carbon Copy, I start with the regeneration knob at about 2 o’clock. Set your delay time to 350ms (12 o’clock on the Carbon Copy) and slowly push that feedback knob clockwise. You’ll hear the repeats build and build until they start feeding back on themselves.
The magic happens right at the oscillation threshold. Back off just a hair from total chaos, and you get this beautiful singing sustain that responds to your playing dynamics. Hit the strings hard, and the oscillation swells. Play softly, and it settles down.

The Boss DD-500’s Hold Function
Here’s where the Boss DD-500 really shines. Its hold function lets you capture a moment of oscillation and freeze it in time. Set up a 480ms delay with high feedback, let it start oscillating, then hit the hold switch. The oscillation becomes a sustained drone that you can play over. A few other higher-end delay pedals will do this too.
Safety First
Before you dive into runaway feedback, protect your gear. Start with your amp volume low, especially if you’re using tube amps. Those high-frequency oscillations can damage speakers if you’re not careful. I always keep my master volume around 3 when experimenting with self-oscillation.
Trust your ears, but protect them too. These effects can get loud fast, and your amp will faithfully reproduce every bit of that chaos.
Experiment. Play. Repeat.
There you have it. It’s not your usual ‘how to use a delay pedal’ guide, but instead five unique delay techniques that can really transform your guitar playing from predictable to captivating.
We covered rhythmic delay, which shows you how to lock into funk grooves with surgical precision. Polyrhythmic overlays opened up jazz fusion territories where time becomes fluid. Textural effects that give your rock and metal playing new dimensions. And other delay techniques to push you into experimental realms where sound design meets songwriting.
But you don’t need to master all five techniques at once. Pick one that speaks to your musical style and spend a week really exploring it. Set your delay to 350ms with 40% feedback and just play. Trust your ears over any settings I’ve suggested.
For beginners, I’d recommend starting with a simple delay pedal. Something with a warm character that’s forgiving when you’re learning. You can’t really go wrong with these, and most will handle everything from slapback to ambient washes beautifully.
But the great things happen when you start combining techniques. Try adding a touch of modulation to your rhythmic patterns, or layer ambient textures under your lead lines. Your pedalboard isn’t just a collection of effects. It’s your creative and song-writing partner.
FAQs
What to do with a delay pedal?
A delay pedal can do far more than just repeat your notes. You can use it to create rhythmic patterns, ambient textures, and even stereo soundscapes. Short delays can thicken your tone, while longer settings add depth and drama. Try using dotted eighth rhythms to sync with your playing, reverse delay for cinematic swells, or self-oscillation for sound design. The key is to treat delay as part of your musical phrasing, not just an add-on effect.
Did Kurt Cobain use delay?
Yes, Kurt Cobain used delay occasionally, mostly during live performances. He is believed to have used a Boss DM-2 Digital Delay to add subtle ambience on certain songs. However, delay was never a core part of his tone. His signature sound relied more on distortion, chorus, and raw dynamics than spacious effects.
What were David Gilmour’s delay settings?
David Gilmour’s delay settings varied by era and song, but most used delay times between 300ms and 580ms, with 2 to 7 repeats and a moderate mix level. In early Pink Floyd, he used the Binson Echorec set around 310ms for rhythmic and ambient textures. Later, he switched to digital delays like the TC 2290 and often used two delays at once. One was set for a short rhythmic repeat and the other for longer atmospheric echo.
Common settings include 380ms for “Run Like Hell”, 430 to 450ms for solos, and 500 to 580ms for songs like “Comfortably Numb.” He often synced delays to tempo using dotted eighth notes, especially during solos. Longer delays usually had a lower mix to avoid muddying the tone. Gilmour’s delay sound is built on layering, timing, and careful use of feedback.
What delay pedal does John Mayer use?
John Mayer has used several delay pedals, but two of his main choices are the Way Huge Aqua Puss and the Eventide TimeFactor. The Aqua Puss offers a short, warm delay ideal for slapback and subtle tone thickening, while the TimeFactor provides multiple presets and longer delay times for more complex effects.
In the past, Mayer has also used the T-Rex Replica for vintage-style delay and occasionally the AdrenaLinn III for rhythmic and filter-based delays on songs like “Bigger Than My Body.” Each pedal serves a specific role depending on the song and setup, often paired with a Fender- or Dumble-style amp.
