Confession time: I’d played in bands for years, got a degree in music, and toured all of Europe before I added a compressor to my pedalboard. Looking back now, I don’t know how I managed without it.
The truth is compressors are hard to understand, and some are far easier to live with than others. I wasted years assuming they were a studio thing. Engineers used compressors, not guitarists playing live on a stage. How wrong I was.
Here is the honest version of how to use a compressor pedal, written by someone who ignored them for too long. What finally sold me was not sustain or squash. It was my own playing changing. I chase far less high-gain stuff these days, and a light compressor is what brings clean and low-gain passages to life. It gives quiet notes a spine.
You can also read our full compressor pedal guide for guitar if you want the wider picture first.
What Is a Compressor Pedal, and How Does It Work?
A compressor pedal controls your dynamics. It makes soft notes louder and loud notes quieter, so your signal comes out more even and more consistent. That is the whole trick. Individual notes and chords stand out more clearly in a mix, and your tone stops jumping around under your fingers.
But that is just the start. A compressor pedal can hand you sustain. Notes ring out longer and pick up a singing quality on solos and melodies, which is why rock and blues players lean on it so hard. It can also add texture: a glassy, polished sheen on clean sounds, or a tighter, more focused edge on distorted ones.
Here is the part nobody tells you. Compression is easy to overdo. I spent years chasing a big, obvious effect, and all I did was squash my tone flat and kill the feel that made my playing mine. The way I use a compressor now is subtle. It adds character rather than announcing itself. You should not always be able to hear it working. You should just miss it when it is gone.
So whether you want the tight punch of funk rhythm, the smooth sustain of a classic rock Gilmour-esque solo, or the steady levels delicate fingerstyle needs, a compressor pedal earns its square on the board. Used with restraint.
Types of Compressor Pedals
Before you dial anything in, it helps to know what kind of compressor pedal you are holding. Most guitar compressors fall into one of four circuit families, and each has its own character. This is the part nobody mentions, and it explains why two compressors set identically can sound nothing alike.
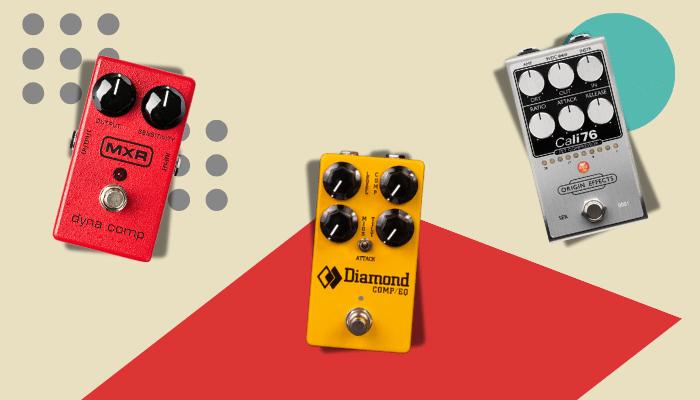
Optical, or opto, compressors let a light source drive the gain change, which softens the attack and release naturally. The result is smooth, forgiving, and transparent, so they suit clean tones, jazz, and fingerstyle where you want control without hearing it. The Diamond Compressor is the one to know.
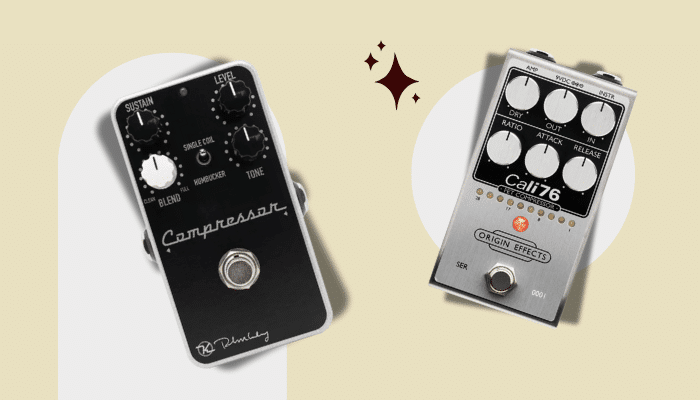
FET is the fast, lively one, with an aggressive edge when you push it. It adds attitude and punch, which is why it suits funk, surf, and percussive playing, and why it can mimic a cranked tube amp. The Origin Effects Cali76 (1176-voiced) and the Wampler Ego 76 are the go-to examples.
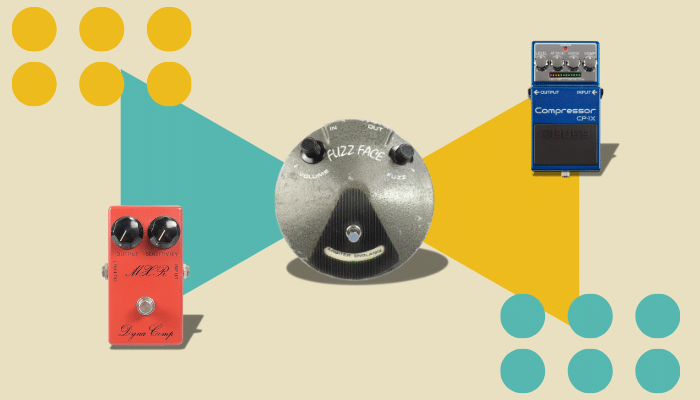
OTA is the classic pedal compressor family. Plenty of colour and midrange, and it gets seriously squishy at high settings. This is the vintage voice country and funk players reach for, and it lives in the MXR Dyna Comp, Keeley Compressor Plus, and Xotic SP.
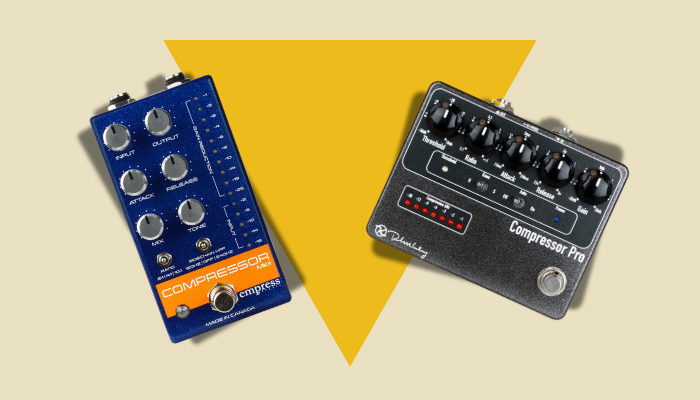
VCA is precise, fast, and low-colour, with tons of dynamic control for funk, pop, and rhythm work. The catch is it is easy to overdo into something lifeless. The Empress Compressor is the standard-bearer.
One thing worth keeping straight, because it trips people up: the MXR Dyna Comp is OTA (fixed-ratio squish), while the Cali76 is FET (1176 control). That contrast, vintage set-and-forget versus full studio control, is exactly what the next section is about.
Controls on a Compressor Pedal
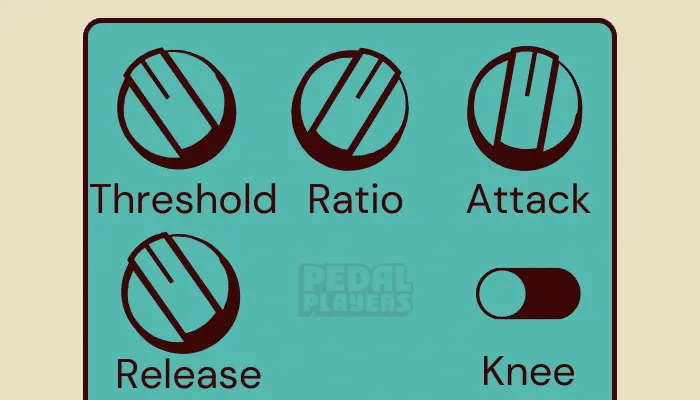
Every compressor pedal is different, but here are the controls you’ll meet on most of them.
Threshold
The threshold control sets the point where the compressor kicks in. Below this level, the compressor sits idle. A higher threshold means it engages later, a lower threshold triggers compression sooner. It typically ranges from 0dB down to around -60dB.
For beginners, start somewhere between -10dB and -25dB. That gives you a noticeable effect without flattening the dynamics of your playing.
Attack
The attack control sets how quickly the compressor responds once the threshold is crossed. Fast attacks, between 1-10ms, smooth out transients but can dull the initial pick attack. Slower attacks, 10-100ms, let more of that pick attack through before compression clamps down. This one confuses people, because many compressors speed the attack up as you turn the knob counterclockwise and slow it down clockwise.
Fast attack settings give you that classic country squish. Slower attacks keep a more modern, dynamic feel.
Release/Sustain
The release control, often labelled sustain, is the opposite of attack. It sets how long the compressor holds the signal after it peaks. Faster releases, roughly 50 to 300ms, let the dynamics snap back quickly and feel responsive. Slower releases sustain notes longer, which is what you want for solos and melodic lines.
Long release times can bring on feedback, so use them with care. Depending on the pedal, release can run from 50ms to several seconds.
Ratio
The ratio control sets how hard the compression bites once the threshold is crossed. This is the mathematical part: a 2:1 ratio means for every 2dB the signal goes over the threshold, only 1dB passes through.
Here is where the pedal you own matters. Many simple guitar compressors have a fixed ratio you cannot change. The MXR Dyna Comp is the famous example. There is no ratio knob, you get the ratio the factory picked, and that simplicity is half its charm. Step up to a Cali76 or a Keeley Compressor Plus and you get full control over the ratio, which is exactly why I moved to one.
Common guitar settings run 2:1 to 6:1 for light to moderate compression, smoothing peaks without ironing the dynamics flat. Push to 10:1 or 20:1 and you are into strong, near-limiting territory where the signal is heavily controlled.
Knee
The knee control shapes how the compression arrives. A hard knee clamps down immediately once the threshold is reached, a more obvious, pronounced effect. Picture a sharply bent leg where the transition is abrupt.
A soft knee eases the compression in gradually as the signal approaches the threshold, making it smoother and harder to spot. The softer the knee, the more transparent it feels.
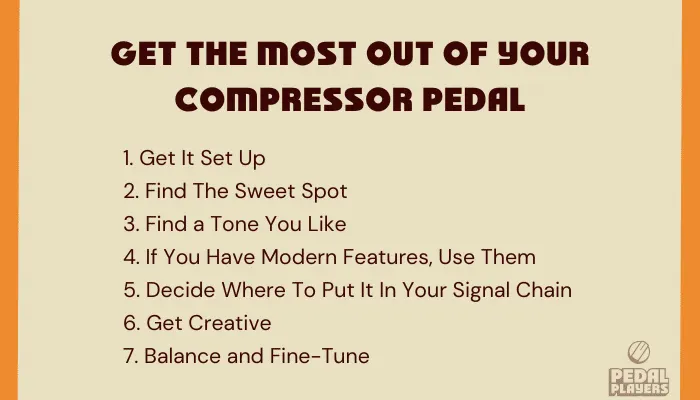
How to Use a Compressor Pedal: Step-by-step
A compressor pedal can genuinely lift your tone, but the settings are where people get lost. Follow these steps to dial one in for the best sound.
All compressors are different, so treat this as a guide. You might not have every control I mention here.
1. Get Your Compressor Pedal Set Up
Start with a clean slate so you can actually hear what the compressor is doing to your signal.
Connect your compressor pedal to your power supply and board. If you are still working out how everything links together, our guide on how to connect multiple guitar pedals walks through it. Then set the threshold, attack, and release knobs to their middle positions. That neutral starting point lets you hear each change as you make it.
2. Find Your Sweet Spot
Now dial in a balanced, noticeable compression effect.
- Set the threshold to around -20dB. This lets the compressor engage without squashing your dynamics.
- If you have the option, set the ratio between 4:1 and 6:1 for moderate compression that smooths peaks while keeping the natural feel of your playing.
- Fine-tune the attack to 10ms and the release to 100ms, a balanced response that suits most styles.
Those are safe starting numbers. But if you want a real recipe on a real pedal, here is mine. I run a Keeley Compressor Plus with the Sustain around 9 or 10 o’clock, the Blend around 2 o’clock, the Tone at noon, and the Level around noon, matched by ear against my bypassed signal. I used to run an MXR Dyna Comp and loved it, but the Keeley gives me far more control and is much easier to get right.
Notice the Sustain sits low. That is deliberate. I am not chasing a huge effect, I am adding a little glue. And matching your Level by ear matters more than any number: you want the compressor to leave your volume where it was, so you are hearing the compression, not a volume boost fooling you. If you want to understand why that matters, read up on unity gain.
3. Find a Tone You Like
To chase a specific sound, use these as starting points.
For a Tighter Sound
Lower the threshold to increase compression and rein your playing in.
For Heavier Compression
Raise the ratio for more squash and sustain, handy for solos and lead lines.
For Punchier Notes
Set a faster attack (1-10ms).
For a Smoother Sound
Set a slower attack (10-100ms) to let the initial pick attack through.
For Quicker Recovery Between Notes
Shorten the release (50-100ms), or lengthen it (100ms+) to sustain notes longer.
4. If You Have Modern Features, Use Them
Some compressor pedals carry features that give you a more natural, versatile sound.
The big one is the blend control, also called parallel compression, which mixes your compressed and uncompressed signals together. This is not new, whatever the marketing says. Parallel compression is a decades-old studio technique, and blend knobs have been standard on guitar compressors for well over a decade. The Wampler Ego, Keeley Compressor Plus, Walrus Audio Deep Six (now on V3), and EHX Tone Corset all have one. Start with the blend around 50% and adjust from there.
For the most transparent result, back the blend off until the noticeable squish at the attack softens. The dry signal keeps your natural dynamics and pick response while the compressed signal adds sustain underneath. That is how you get compression that helps without ever announcing itself.
5. Decide Where to Place Your Compressor in Your Signal Chain
Where the compressor sits in your signal chain changes your tone more than most people expect. It is worth experimenting until you find the spot you like.
Compressor Before or After Overdrive
This is the question players actually search for, and it deserves a real answer instead of “try both.” Both positions work. They just do different jobs.
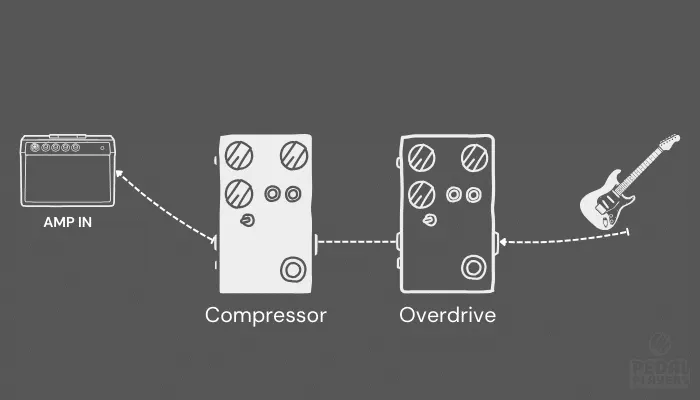
Place the compressor before your overdrive and it evens out the signal before it hits the gain. You get smoother, more controlled distortion, and it is the classic funk and country move.
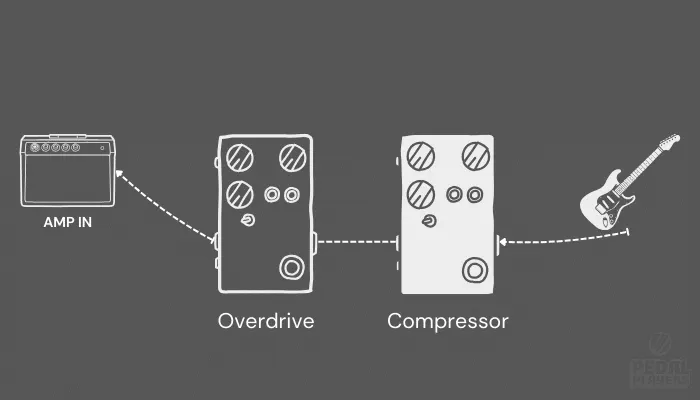
Place the compressor after your overdrive and something more subtle happens. It compensates for the volume drop you get when you roll your guitar volume back to clean up. The compressor holds your level steady as you clean up, which a front-of-chain compressor simply cannot do, because up front the drive always gets hit just as hard no matter where your volume knob sits. That is the trick behind a lot of polished, produced-sounding rhythm tones. Origin Effects make this exact case in their own tech tips, and it holds up.
So where do I put mine? Before. That is my default and I prefer it that way. Every so often I move it after the drive and it does give a more polished, produced feel, so I get why players go there. Andy Timmons runs his after the drive, and nobody is telling him he is wrong. If your rig leans on the volume-knob clean-up trick, our guide on guitar volume knob techniques is worth a read, because that is the whole argument for going after.
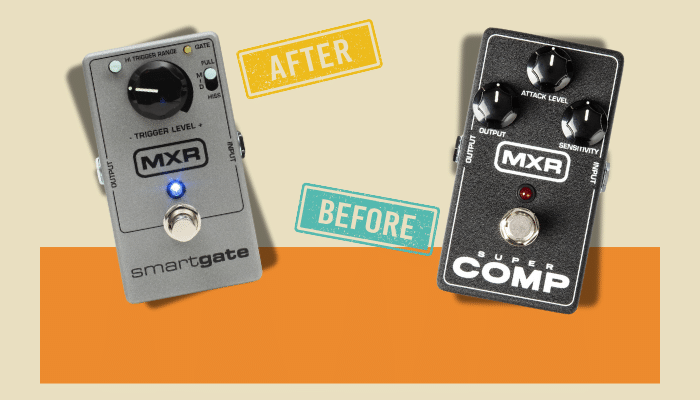
Fuzz is its own conversation, and we cover it in compressor before or after fuzz. If you also run a noise gate, where the gate sits relative to the compressor matters too. And for the bigger picture, our guide on how to set up a guitar pedalboard puts the whole chain in order.
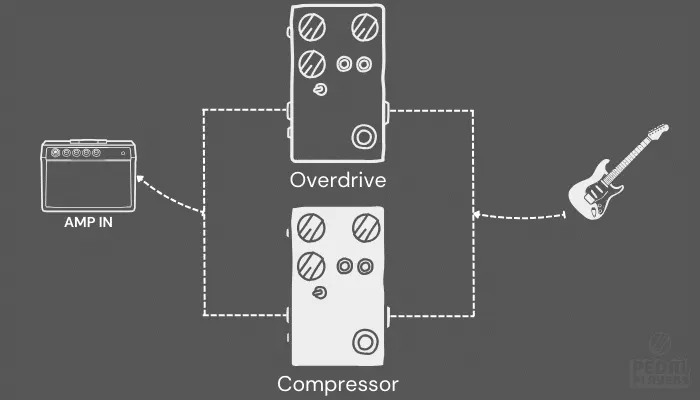
Try Parallel Paths
Use a pedal with a blend knob, or run a parallel setup, to get the best of both placements. You keep your natural dynamics while the compression works underneath.
6. Get Creative
If you want to push your compressor pedal past the sensible settings, some extreme choices give you unique textures.
For Squashed and Saturated Sounds
Set a high ratio (10:1 or 20:1) for a heavily compressed, saturated sound. It gets almost fuzzy, and it suits leads and big rhythm parts.
For Funky Pumping Effects
Use fast attack and release settings for a rhythmic, pumping feel. Try the ratio around 8:1 or 10:1, attack at 1-10ms, and release at 50-100ms for a choppy, staccato effect.
As a Clean Boost
Crank the level and keep the compression light and you have a solo boost that also tightens your tone. It is one of the most underrated tricks a compressor can do, and we dig into it in using a compressor pedal as a boost.
7. Balancing and Fine-Tuning
Getting the balance right keeps your tone musical instead of flat. This is the part that takes real time, so get to know your compressor pedal. It rewards tinkering.
A few habits that help. A/B constantly: switch the compressor on and off to check it is helping and not just making things louder or duller. Tweak in small moves and listen hard, because compression works in tiny increments and big turns hide what a knob actually does. And always test in context. A setting that sounds perfect alone at home can vanish or turn muddy the second a band and a room get involved.
Here is the thing I wish someone had told me sooner. You do not need a compressor to be a great player, and I could gig every show without one. But a little compression on my clean passages sounds better to me, and it makes me trust my tone. When you trust your tone, you play better. That is the whole point. Not the squash. The confidence.