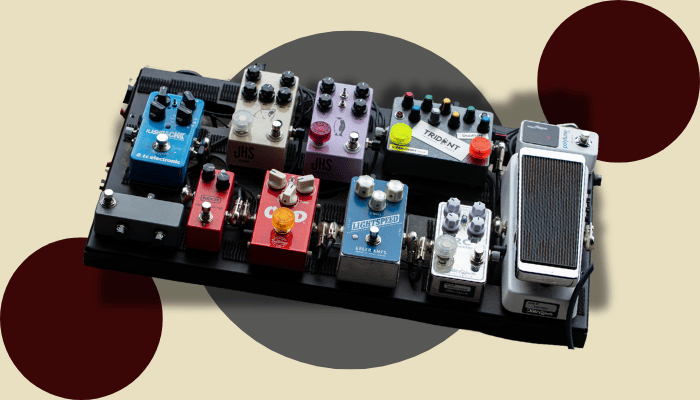
Your pedalboard looks like a musical disaster zone. Cables snaking everywhere, signal loss eating your tone, and every new pedal adding more confusion instead of better sound. You’re not alone in this chaos.
Setting up a pedal board guitar effects chain can feel overwhelming!
I’ve seen guitarists with incredible pedals who sound awful because their signal chain is backwards. You know what I’m talking about. That fuzzy, lifeless tone that makes your $200 overdrive sound like it came from a cereal box. The delays that feed back into shrieking noise the moment you turn them up. The phaser that sounds thin and weak when it should be thick and swirling.
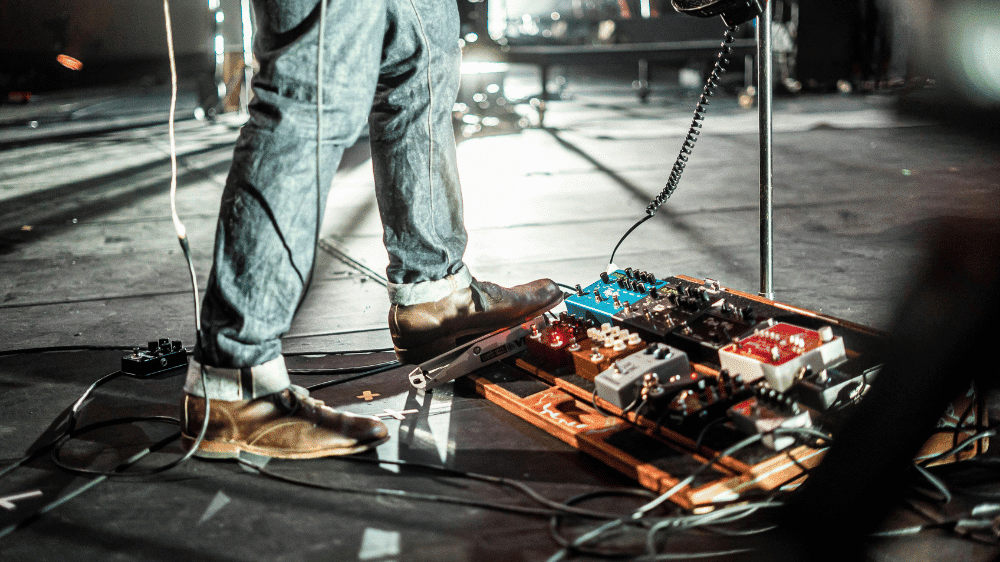
Here’s the truth: pedal order isn’t just preference. It’s physics.
Put a compressor after your distortion and you’ll amplify circuit hiss by 15dB. Set up your delays wrong and you’ll get muddy trails that bury your playing. One wrong move and your whole rig sounds like you’re playing through a blanket.
But there’s great news.
You don’t need to guess anymore. You don’t need years of trial and error or expensive mistakes. There’s a systematic approach that professional touring guitarists use, and I’m going to show you exactly how to set up a guitar pedalboard correctly.
In this guide, you’ll learn the proven signal flow principles that make David Gilmour’s delays sing and John Mayer’s compressor sparkle. You’ll discover why certain layouts reduce noise by 12dB and how spatial organization can transform your live performance. No more guesswork. No more compromises. Just professional-sounding results from the pedals you probably already own.
Your pedalboard is about to become your secret weapon instead of your biggest frustration.
Table of Contents
1. Guitar Pedal Signal Chain Order
Ever wonder why your pedals sound incredible in the music store but muddy at home? The answer lies in signal chain order, and it’s simpler than you think.
The Golden Rule: Dynamics First, Modulation Last
Your signal chain should mirror how sound moves through a recording studio.
Dynamics processors like compressors come first, just like they do in professional mixing. Then pitch effects, followed by distortion, and finally modulation and time-based effects.
Here’s why this matters. When you place a compressor after distortion, you’re amplifying all that circuit noise by 15dB. That’s not character, that’s just hiss.
Unless you’re intentionally trying something different (which is totally cool and legit), your setup should be:
Guitar → Dynamics → Pitch → Gain → Modulation → Time-based.

Why Compression Before Distortion Changes Everything
Think of compression as evening out your playing dynamics before they hit the distortion circuit. I always place my compressor first, setting it to a gentle 3:1 ratio with 2ms attack. This gives the my drive pedals a more consistent input level to work with.
The Boss DS-1, or any of your drive pedals, shine when they receive this controlled signal. The Boss’ asymmetric clipping circuit produces that mid-forward aggression you hear on countless records.
Fun fact: On Kurt Cobain’s pedalboard, he placed his DS-1 after a Boss tuner for (almost) exactly this reason. The buffer of the tuner helped stabilize the input impedance.

Common Signal Chain Mistakes That Kill Your Tone
The biggest mistake I see from guitarists setting up a guitar pedalboard? Unintentionally, putting modulation effects before distortion.
When you place a chorus before your drive pedal, you’re asking the distortion to process a constantly shifting signal. Engineers measure 3kHz high-frequency roll-off when this happens, robbing your tone of harmonic complexity.
Another tone killer is running delays into distortion. Your delay repeats get crunched up, losing their natural decay. David Gilmour’s iconic Pulse tour setup ran delays through the effects loop precisely to avoid this problem. Those pristine delay trails wouldn’t exist if he’d placed them before his preamp.
Of course, there’s no reason why you can’t do these pedal orders. But do them with intention.

The Boss DS-1: Perfect Mid-Chain Placement
I always recommend the Boss DS-1 for players building their first board. It works perfectly in the gain section of your chain. Place it after any boosts or compressors, but before modulation effects. Its input impedance plays nicely with most pedals, and it cuts through mixes without getting buried.
You can even use it for modern metal tones. Try the “boosted DS-1” technique. Place a Tube Screamer before it to tighten the low-end response while adding harmonic complexity. This transforms the DS-1 from a vintage punk box into a modern metal machine.
Your ears are the final judge, but these principles give you a solid foundation. Start with this order and adjust based on what sounds best to you.
2. Pedalboard Size and Layout Tips
Here’s the truth about pedalboard sizes: you’re not choosing for the pedals you have right now. You’re choosing for the pedals you’ll want next year.
Most guitarists make the same mistake. They count their current pedals, buy a board that fits them perfectly, then feel trapped when they discover something amazing they want to add. I’ve seen this cycle wreck more budgets than I care to count.
Start with Your Playing Style, Not Your Pedal Count
Your board size should match how you actually play guitar. If you’re a bedroom player who occasionally jams with friends, a small board like the Pedaltrain Metro 20 makes perfect sense. It holds 5 pedals, fits in a backpack, and doesn’t dominate your living room.
But if you’re gigging regularly or recording, you need breathing room. Medium boards around 24×12″ give you space for 8-10 pedals plus proper cable management. The extra space isn’t wasted. It’s your insurance policy against cramped layouts and overheating issues.
Large boards over 30″ wide start creating new problems. You’ll stretch your foot awkwardly to reach corner pedals, and stage space becomes a real concern. Unless you’re running a Pink Floyd tribute band, resist the urge to go huge.

Grid vs Linear Layout Strategy
Here’s where your board choice gets interesting. Linear layouts put all your pedals in a single row, perfect for simple signal chains. You can see every pedal clearly, and your foot movement stays natural.
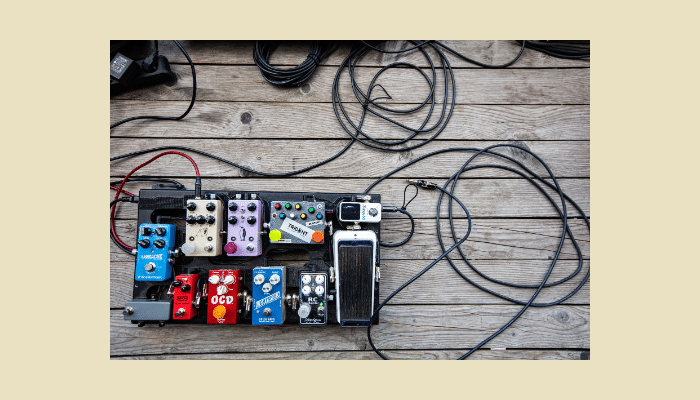
Grid layouts stack pedals in rows, fitting more effects in less floor space. But they create hierarchy issues. Which pedals deserve front-row access? Your core drive pedals and time-based effects should be closest to you, with utility pedals like tuners tucked behind.
Planning for Future Additions
Smart pedalboard builders leave 20% of their board empty. That space lets you add pedals without rebuilding everything. When I see a perfectly packed board with no room to grow, I know that guitarist will be shopping for a bigger board within six months.
Consider cable runs too. Dense packing looks neat but makes swapping pedals a nightmare. Leave gaps for patch cables to breathe, and your future self will thank you.
The goal isn’t to fill every square inch. It’s to create a system that grows with your musical journey.
3. Core Pedal Placement Tips
Your pedal collection is growing. You’ve got this amazing collection of tonal possibilities sitting on your desk (board). But, 80% of guitarists don’t have a clue where each pedal actually goes.
Most players think it’s about memorizing some rigid rule book. The real secret is understanding why certain pedals work better in specific spots. Once you grasp the logic, you can break the rules intelligently.
Start Smart: Tuner and Buffer Strategy
Your tuner always goes first. No exceptions. It needs to see your raw guitar signal without any processing. I’ve watched guitarists struggle with wonky tuning because they buried their tuner three pedals deep in the chain.
Here’s where it gets interesting: if you’re using a buffered tuner like a Boss TU-3, you’ve just solved your first signal problem. That buffer preserves your guitar’s high-end across long cable runs. Without it, you lose that crispy treble after about 15 feet of cable.
If your tuner is true bypass, you’ll need a dedicated buffer. The Keeley Katana works perfectly for this. Place it early in your chain, preferably right after your tuner.
Want to dive deeper into tuner placement? Check out our full guide on where to put a tuner on your pedalboard and why it matters more than you think.
Live Performance Accessibility Matters
Think about which pedals you actually stomp during songs. Your core drive pedal and main delay need to be front and center. That weird experimental fuzz you use for one song? It can go in the back row.
On my home pedalboard, I have a TC Electronic Hall of Fame. It’s perfect for this approach. Its reverb sounds incredible, but set it once and leave it. If you have a reverb pedal like this, position it at the end of your chain where it can create those lush ambient textures without getting in your way during performances.
I keep my most-used pedals in an imaginary “strike zone”. This is the area my foot can reach without looking down. Everything else gets positioned based on how often I actually use it.
Listen carefully. Your ears will tell you if something sounds wrong. Trust them over any placement rule you read online.
4. Pedalboard Power and Cable Tips
You’ve organized your pedals in a perfect signal order. Now comes the part that separates amateur boards from professional setups.
A noisy pedalboard will kill your tone faster than any wrong pedal placement. The culprit? Almost always, it’s a poor power supply and sloppy cable management.
Why Isolated Power Changes Everything
Your pedals need clean, consistent power to perform their best. That daisy chain power supply you’ve been using? It’s creating a web of noise and interference between your pedals. We’ve all made this mistake. I used a cheap daisy chain for years before I faced the truth.
Digital pedals like the Strymon Timeline need 300mA of isolated power, while your analog Tubescreamer only needs around 10mA. This is a massive difference. When you share power between them, digital switching noise bleeds into your analog circuits. This creates that annoying high-frequency whine you hear during quiet passages.
It’s so important to invest in an isolated power supply. I use the Cioks DC7, but there’s plenty of great ones out there. Each output provides clean, separated power to individual pedals.
The difference really is immediate. Your reverb tails become quieter, your delays sound cleaner, and that mysterious buzz disappears.

Confused about pedal power? Learn how to power your guitar pedals properly in our complete guide: How to Power Guitar Pedals: Everything You Need to Know.
Cable Routing That Actually Works
Under-board cable routing reduces electromagnetic interference compared to cables draped across your pedals. Route your patch cables underneath your pedalboard, not on top.
Here’s my technique: Leave 2cm of slack at each connection point. This “service loop” prevents solder joints from breaking when you move your board. A few of my guitar tech friends use this method on their touring rigs. And for good reason.
Use flat patch cables where space is tight, but don’t obsess over cable length. A 6-inch cable works fine between adjacent pedals, even if a 3-inch exists.
Smart Organization Systems
Velcro and Dual-lock tape beat zip ties every time for pedal mounting. You can reposition pedals without cutting anything. Use the hook side on your pedalboard, loop side on your pedals.
️ Need help securing your pedals? Check out our guide on how to attach a pedal to a pedalboard for four easy, reliable solutions.
For cables, skip the zip ties entirely. Use velcro cable ties or simple twist ties. You’ll thank yourself when you need to swap a cable during a gig.
Bundle power cables separately from signal cables. Keep them at 90-degree angles when they must cross. This prevents power supply hum from coupling into your audio signal.
Your board should look professional and sound even better. Clean power and organized cables aren’t just about aesthetics. They’re about preserving every nuance of your carefully crafted tone.

5. Advanced Pedal Combos
I’ll be honest with you. The best stuff happens when you stop following the rules and start breaking them. Most guitarists stick to the traditional pedal order, but professionals know that creative chaos often leads to breakthrough sounds.
Here’s where you can create something genuinely unique on your board.
The Delay-Reverb Debate: Order Matters More Than You Think
Running delay into reverb gives you classic controlled ambience. Your delay repeats decay naturally into the reverb wash, creating that David Gilmour-style floating texture. I set my MXR Carbon Copy to around 350ms with 40% feedback, then let it bloom into my reverb for those singing solo tones.
But flip it around, and everything changes.
Reverb into delay creates a completely different beast. Now you’re repeating the entire reverb-soaked signal, building massive walls of sound. This is how Kevin Shields from My Bloody Valentine crafted those shoegaze storms. The delay grabs every bit of that reverb tail and throws it back at you.
Parallel Processing: The Professional’s Secret Weapon
Most guitarists think linearly, but parallel effects loops open up a whole new dimension. You can run one signal path through aggressive distortion while sending another through clean delay and reverb.
When you blend these paths back together, you get incredible depth. The clean delays provide space while the driven signal delivers punch. It’s like having two guitarists playing the same part with completely different tones.

Stacking Similar Effects for Orchestral Depth
Here’s something most players never try: stack multiple delays with different timing. Set your delay pedal to 380ms with light feedback, then add a second digital delay at 285ms. The mathematical relationship between these timing creates polyrhythmic textures that sound impossibly complex but musical.
The same principle works with drives. Stack an overdrive set to low gain after a Tube Screamer, and you get this singing saturation that neither pedal achieves alone.
Trust your ears over any rulebook. The most interesting sounds come from combinations that shouldn’t work but somehow do.
6. Test and Tweak Your Pedalboard
Your pedalboard arrangement only gets better when you put it through real-world testing. Many guitarists spend time setting up a guitar pedalboard once and never revisit the layout, but the pros know that systematic testing reveals surprising improvements.
Recording Your Tests
Start by recording short loops with your current setup. You’ll want to capture different musical contexts. Play a clean chord progression, then the same progression with drive engaged, and finally with your full ambient wash of delays and reverbs.
Here’s the testing approach I use:
Record 30 seconds of each configuration, then A/B test different arrangements. Move your delay from after reverb to before it, then record the same passage. When you listen back, you’ll hear how the delay repeats interact differently with the reverb tail.

Systematic A/B Testing
The key is changing one thing at a time.
If you’re testing whether your overdrive sounds better before or after your fuzz, don’t also move your wah pedal. Keep everything else identical so you can isolate what actually makes the difference.
I always test three scenarios: bedroom volume, band practice level, and stage volume.
What sounds perfect at home might get muddy when you’re competing with drums and bass. Your delay might need different settings entirely when you’re playing through a cranked amp versus a clean one.
Context-Specific Adjustments
Your board needs to work across different musical situations. That gorgeous 450ms delay with 60% feedback might sound amazing on ballads but turn into chaos during punk rock chord changes. Test your layout with multiple genres, even if you don’t usually play them.
Pay attention to how your feet actually move during songs. Can you hit the delay and reverb together for that big chorus moment? Is your tuner accessible when you’re already standing on your wah pedal?
The best pedalboard layout is the one that works consistently across all your musical contexts. Trust your ears, write down what works, and don’t be afraid to keep refining until it feels absolutely right.
Your Pedalboard is a Work in Progress (and That’s a Good Thing)
Building your perfect pedalboard isn’t about following rules. It’s about understanding the fundamentals and trusting your ears to guide you forward.
The signal chain basics we’ve covered keep you grounded. Gain stages before time effects, buffers where you need them, and power that stays clean. These principles work whether you’re running three pedals or thirty. Your guitar’s signal travels through each pedal in sequence, and that journey shapes your tone at every step.
Start simple and expand gradually. The Boss DS-1 [1] we mentioned makes an excellent foundation distortion for any layout. You can place it early for aggressive rhythm work or later for saturated leads. The beauty lies in experimenting with different positions until you find what serves your music best.
Your pedalboard will evolve with your playing. Keep 20% of your board space open for future additions and changes. Many players use modular sections that adapt as their needs change. This approach prevents you from outgrowing your pedalboard setup too quickly.
The most important lesson?
There’s no perfect board that works for everyone. What matters is building something that inspires you to play more and explore new sounds. Trust your instincts, start with quality basics, and let your creativity guide the rest.
FAQs
How should I arrange my guitar pedals?
Start with: Tuner → Compressor → Pitch → Overdrive → Modulation → Delay → Reverb. Put your most-used pedals where your foot can reach them quickly.
How do I power my guitar pedals properly?
Use an isolated power supply to avoid noise. Digital pedals need more current than analog ones. Never daisy chain digital to analog pedals.
What’s the best way to attach pedals to a board?
Dual Lock tape is the gold standard: strong hold, easy removal. Velcro works too, but not as sturdy. Avoid zip ties, they’re a pain to adjust.
Does fuzz go before or after overdrive?
Before. Fuzz pedals need a raw signal to sound right. Putting overdrive after lets you shape and boost the fuzz tone.
How do I keep my pedalboard tidy and organized?
Use flat patch cables, route wires under the board, and keep power and audio cables separate. Leave room to grow. Neat boards are flexible boards.
Are guitar pedalboards worth it for beginners?
Yes. They protect your pedals, make setup faster, and help you build a better signal chain, even with just a few effects.


