You’ve probably heard guitarists talk about the 4 cable method (or 4CM) like it’s some secret ingredient to killer tone. It’s not magic. It might as well be if you’ve never tried it.
Put simply, the 4 cable method is a way to wire your amp, pedals, and effects loop so everything sits exactly where it should in your signal chain. Your overdrives and wahs stay in front of the amp. Your delays and reverbs go into the effects loop. You get one clean signal path instead of a muddy pile-up, and if that’s the way you like to work, this is how you get there.
If you’ve got a nice amp with an effects loop, I think this method is worth learning.
Let’s break it down step by step.
Why Use the 4 Cable Method?
Most amps sound their best when you turn up the preamp for that natural, driven distortion. That’s the sound you’re paying for. It’s also the sound that ruins your time-based effects.
Here’s why. Your amp’s gain, the distortion and the compression that comes with it, is generated in the preamp. The effects loop sits between the preamp and the power amp, after all that gain has already happened. So a delay or reverb plugged into the front of a driven amp gets pushed through the preamp’s distortion, and the repeats smear into mush. Put the same delay in the loop, after the preamp, and it stays clear. Every trail sits clean on top of your drive instead of drowning in it.
That’s the whole point of the 4 cable method. It splits your signal so drives and wahs stay in front of the amp, and delays, reverbs, and modulation go in the loop. If you want the deeper version of this argument, read effects loop vs front of amp.
I’ll be honest about where this lands for me. I run 4CM on the drive channel of my Bad Cat Mod Shop Black Cat, and with a band I can hear my delays far more clearly when they’re in the loop. Better clarity, and it genuinely lifts my confidence when I’m playing. I never run the amp super driven, so even in the front they don’t get mangled. But the difference is real, and it’s the reason I bother.
What Gear Do You Need?
Spoiler: you need four cables. You also need two other things.
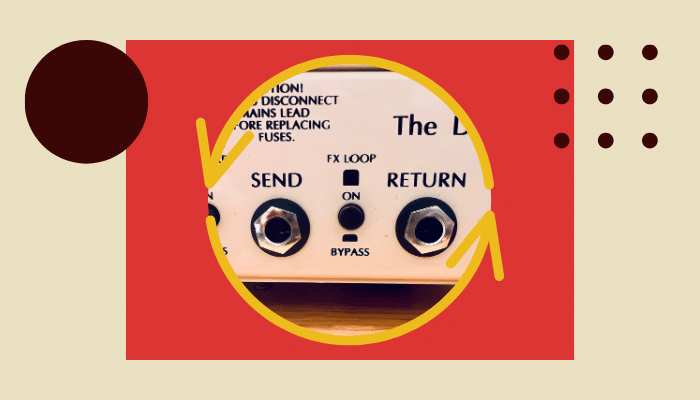
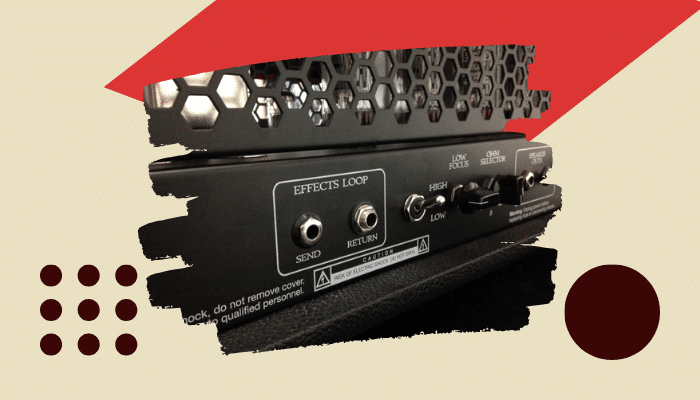
The first is an amp with an effects loop. You can’t do the 4 cable method without one. Look for an “FX Loop” section on the back of your amp with Send and Return jacks. If that’s new to you, read what is an effects loop on an amp.
The second is your effects rig, either a multi-effects unit or individual pedals. A multi-effects unit is the easy path, but only if it has its own Send and Return in addition to its Input and Output, plus per-block routing so you can place each effect either in front of the amp or in the loop. That’s the enabling spec.
Plenty of current units do it. The Line 6 Helix and HX Stomp are the obvious ones. On the HX Stomp the Send and Return double as your 4CM insert, and that’s exactly the setup people search for. The Boss GT-1000 and GT-1000CORE give you dedicated Send/Return jacks you can drop in anywhere in the chain. The Neural DSP Quad Cortex, Line 6 POD Go, and Fractal FM3 and FM9 all handle it too. You can also do the whole thing with normal stompboxes on a pedalboard.
Your cables don’t need to be boutique, but use decently shielded ones. Shorter runs preserve your tone. Longer runs give you flexibility. More on that trade-off below.
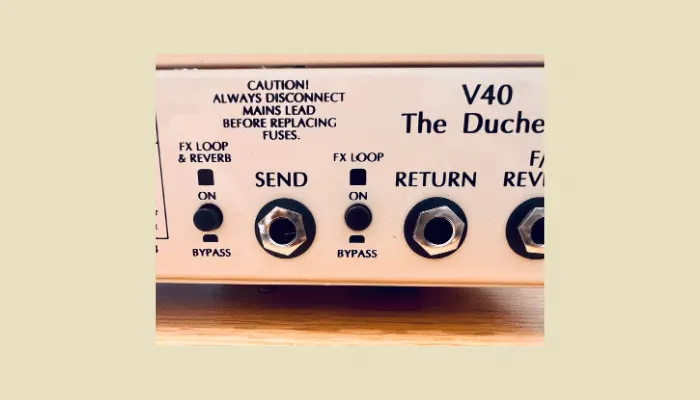
An amp effects loop
Series vs Parallel Effects Loops
Before you wire anything, find out what kind of loop your amp has. It changes how the 4 cable method behaves.
A series loop is the common one. The whole preamp signal passes straight through the loop and back, and there’s no Mix knob. This is what the 4 cable method assumes, and it’s what you want.
A parallel loop has a Mix control that blends the dry preamp signal with the effected signal from the loop. If your amp has a Mix knob on its loop, that’s your tell. On a parallel loop, set the Mix to 100% wet to emulate a series loop for 4CM. Leave it blended and you’ll get an unexpected mix and possible phase weirdness, which is not what you set all this up for.
How the 4 Cable Method Works
Two ways to wire it: with a multi-effects unit, and with individual pedals. Here’s both.
Before the cables, a quick map of what goes where.
| Goes in front of the amp | Goes in the loop |
|---|---|
| Overdrive | Delay |
| Distortion and fuzz | Reverb |
| Wah | Modulation (chorus, flanger, phaser) |
| Compression | Tremolo |
That’s a starting point, not a law. Some players run chorus in front of distortion for a grittier sound. Try it both ways.
Set Up the 4 Cable Method With a Multi-Effects Unit
First, check that your multi-effects unit actually has an effects loop Send and Return. Not all do. You’ll also need to edit your patches to tell the unit which effects go to the loop and which stay in front of the amp. How you do that varies by model, so check your manual.
Then run the cables (diagram below):
- Cable 1: Guitar to Multi-Effects Input. Plug your guitar into the input of your multi-effects unit.
- Cable 2: Multi-Effects Send to Amp Input. Connect the Send jack on your multi-effects unit to your amp’s input.
- Cable 3: Amp FX Loop Send to Multi-Effects Return. Connect the Send jack from your amp’s effects loop to the Return jack on your multi-effects unit.
- Cable 4: Multi-Effects Output to Amp FX Loop Return. Connect the Output jack on your multi-effects unit to the Return jack of your amp’s effects loop.
4 Cable Method Diagram for Multi-Effects Pedals
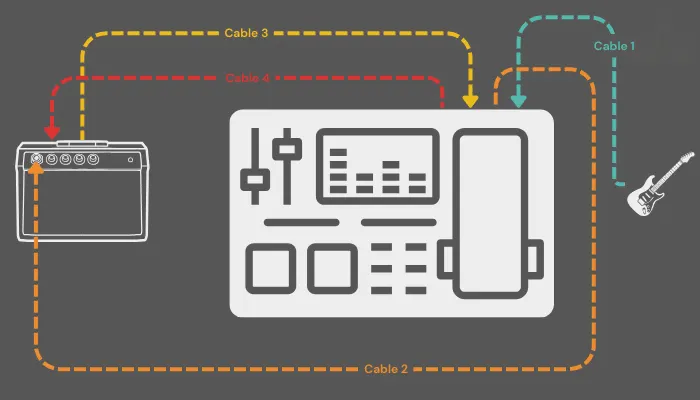
I always use colored cables to keep things organized. It saves you time during setup and troubleshooting when something isn’t working.
Set Up the 4 Cable Method with Individual Pedals
If you’re running a pedalboard, split your pedals into two groups: pedals for the front of your amp, and pedals for the effects loop.
Then run the cables (diagram below):
- Cable 1: Guitar to First Pedal in Your Front-of-Amp Chain. Plug your guitar into the input of your first front-of-amp pedal, usually a tuner, overdrive, or compressor.
- Cable 2: Last Front-of-Amp Pedal to Amp Input. Connect the output of your last front-of-amp pedal to the input of your amp.
- Cable 3: Amp FX Loop Send to First Pedal in the Effects Loop. Connect the Send jack of your amp’s effects loop to the input of your first effects-loop pedal, such as a delay or reverb.
- Cable 4: Last Effects Loop Pedal to Amp FX Loop Return. Connect the output of your last effects-loop pedal to the Return jack of your amp’s effects loop.
4 Cable Method Diagram for Individual Pedals
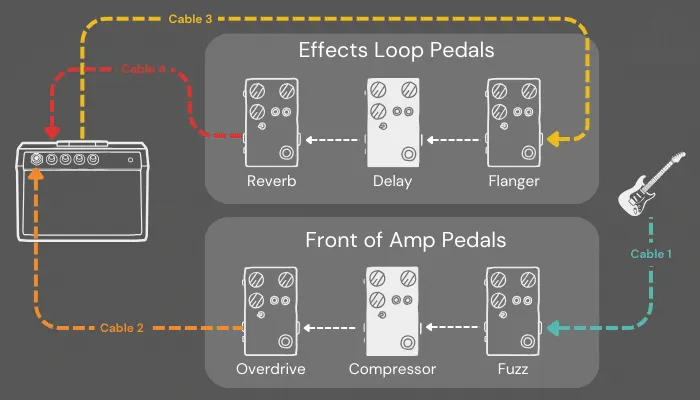
That’s it. Your 4 cable method signal path is set up and ready to go. You’ve built two separate paths: one for effects before the amp, one for effects after the preamp. Don’t be afraid to swap the order of your pedals. Moving effects around can lead to some great sounds.
Does the 4 Cable Method Cause Tone Loss?
It can, and it’s worth being honest about it. The 4 cable method adds two or more extra cable runs to your signal path. More cable means more capacitance, and more capacitance means a little of your high end quietly bleeds away, especially on long runs.
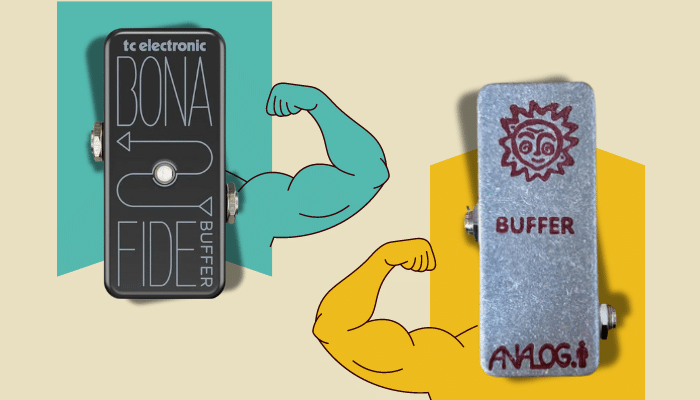
The saving grace is buffering. Most modern multi-effects units have buffered inputs and outputs built specifically to drive long cable runs without treble loss, which is exactly why they tolerate the extra 4CM cabling better than passive pedals do. If you’re running true-bypass stompboxes and long cables, and you notice your top end going dull, that’s where a buffer earns its place. Read how to use a guitar buffer pedal for where to put one, and how many pedals before you need a buffer if you’re not sure you’ve hit that point yet.
Noise Gates and the 4 Cable Method
A driven amp hisses. The 4 cable method gives you two good places to gate that noise: in front of the amp, to kill input noise from your guitar and drives, and in the effects loop, to kill hiss and hum coming out of the preamp.
The clean way to cover both at once is a gate with two connection points, like the ISP Decimator G String. It senses your clean guitar signal at the front while suppressing preamp noise in the loop, so it gates hard without choking your sustain. If you want the affordable route, the Boss NS-2 does the same job in the X-pattern layout, and plenty of high-gain players swear by it. This is the body behind the noise-gate question in the FAQ below, so your gate isn’t left floating without a home.
4 Cable Method Variations
The 4 cable method is the standard, but it has a few relatives worth knowing.
The 5-cable method is standard 4CM plus a fifth cable, running from your processor’s Amp Control or Ext Amp jack to your amp’s footswitch input. Now a patch change can flip your amp’s channel from clean to dirty automatically. Handy if you switch channels a lot mid-set.
The X-pattern is the high-gain noise-gate routing described above, using a Boss NS-2 or ISP Decimator so the gate senses the clean signal while it clamps the preamp hiss.
Preamp bypass skips the amp’s preamp entirely. You run guitar to processor to the amp’s FX Return only, and let the processor’s amp model do the preamp work while your amp acts as a plain power engine.
And the so-called 2-cable method isn’t really a technique. It’s just the standard front-of-amp hookup with no loop involved, guitar to pedals to amp input. Nothing wrong with it. It’s where most of us start.
Common Mistakes and Troubleshooting
The 4 cable method has more connection points than a normal rig, so there’s more to go wrong. Most of it is simple once you know where to look.
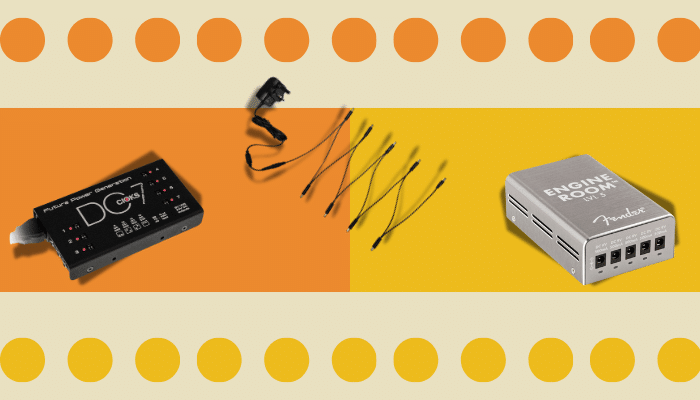
Signal hum or noise usually comes from a ground loop. Start with an isolated power supply for your pedals and effects unit. I run a Cioks DC7 and have never had a problem. If mains hum still won’t quit, an Ebtech Hum X or Hum Eliminator will break a stubborn ground loop while keeping a safe ground. Don’t fix it by lifting the ground on a power plug. That’s a shock risk, not a solution.
Incorrect levels show up as effects that are too quiet or too loud. Check the levels on your effects unit and your amp. Some effects loops even have their own level control.
Cables in the wrong jacks is the classic. No shame, we’ve all done it. If you’re getting no sound, work through every connection one at a time. It’s easy to swap a Send and a Return, and that one mistake accounts for most silent 4CM rigs. Troubleshooting a no-sound moment just takes a little longer with the extra cables, but it’s nearly always something this simple.
Signal loss on long runs points back to the buffer question above. If your high end is fading, add a guitar buffer pedal.
Best Practices for Using the 4 Cable Method
Know your effects order first. Overdrives, fuzzes, and wahs go in front of the amp. Delays, reverbs, and modulation go in the loop. That’s your default map. Then break it on purpose when your ears tell you to.
Keep your cables short. My guitar-to-input run is 10 ft, and my two FX loop runs are 15 ft each. I’ve tied those two 15 ft cables side by side so they run neat instead of making a mess on the floor. Honestly, setting my board up for the 4 cable method was real work, a lot of rearranging. But now the board does both 4CM and front-of-amp, and switching to 4CM costs me about 5 minutes, tops.
Power everything cleanly and learn how to power guitar pedals properly, because clean power is half the battle against noise. And if your board isn’t built for this yet, how to set up a guitar pedalboard will save you some of the trial and error I went through.
Why Every Guitarist Should Try the Four Cable Method
Here’s the honest line on the 4 cable method. It gives you control, clarity, and flexibility. It’s also more work, and it isn’t for every amp.
I have amps I wouldn’t bother wiring this way, because they just sound better clean and the whole exercise buys me nothing. But I have a couple whose drive channel is such a pull that carrying the extra cables and spending the extra few minutes is an easy yes.
So that’s your test. If you love your amp’s drive channel and you want your delays to stay clear on top of it, the 4 cable method is worth every cable. If your amp lives on the clean channel, save yourself the trouble. Be honest about which amp you’ve got, and wire accordingly.