
The first time I heard The Edge’s cascading guitar arpeggios on “Where the Streets Have No Name,” I knew something was happening that I didn’t understand. Those shimmering, rhythmic echoes that seemed to dance around his simple chord progressions. They weren’t just notes. They were entire musical conversations between his playing and some mysterious effect that turned basic patterns into epic sounds.
That mystery effect was delay.
And it’s been quietly revolutionizing guitar music for over 70 years.
From Elvis Presley’s subtle slapback that made his early recordings jump out of 1950s radio speakers, to David Gilmour’s soaring Pink Floyd solos that seem to float in infinite space, to modern ambient guitarists creating entire symphonies from single notes – guitar delay effects have shaped the sound of popular music in ways most listeners never consciously notice but always feel.
Here’s what most guitarists don’t realize: delay isn’t just about adding echoes to your guitar tone.
It’s about understanding rhythm, space, and musical conversation. It’s about knowing when a 120-millisecond slapback will make your country licks pop, and when an 800-millisecond ambient wash will transform a simple chord into an evolving soundscape that builds emotion without playing a single additional note.
This comprehensive guide will take you from delay confusion to delay mastery.
You’ll discover how different delay types shape your sound, learn the specific settings that create iconic tones across every genre, and find the perfect delay pedal for your musical goals and budget. Whether you’re just starting to explore time-based effects or ready to dive into advanced techniques that professional guitarists use to craft their signature sounds, you’ll leave with the knowledge to use delay as a creative instrument, not just an effect.
Let’s unlock the secret language of echoes that’s been hiding in your favorite songs all along.
What Are Guitar Delay Effects?
Guitar delay effects are digital or analog recreations of natural echo that capture your guitar signal, store it briefly, then play it back after a predetermined time interval. Think of shouting across a canyon and hearing your voice bounce back at regular intervals. That’s exactly what delay does to your guitar signal, but with precise control over timing, volume, and character.
When you play a chord or note through a delay pedal, you hear your original “dry” signal immediately, followed by one or more “wet” repetitions that gradually fade away. These aren’t random echoes. They’re carefully timed musical events that can improve rhythm, extend melodies, or create atmospheric textures that are impossible to recreate through traditional playing alone.

Delay vs Echo vs Reverb: Understanding the Differences
The confusion between delay, echo, and reverb trips up many guitarists, but the differences matter when choosing the right effect for your music.
Delay creates discrete, rhythmically timed repetitions of your original signal. Each repeat is clearly audible as a separate musical event. Like hearing your chord progression played back by an invisible guitarist who’s perfectly in time. You can count the individual repeats: one, two, three, four.
Echo is technically the same phenomenon as delay. The terms are often used interchangeably. However, “echo” typically refers to natural acoustic reflections, while “delay” describes the controlled, electronic recreation of this effect.
Reverb simulates the complex acoustic reflections of physical spaces – the sound of playing in a bathroom, concert hall, or cathedral. Instead of discrete repeats, reverb creates a smooth wash of blended reflections that decay gradually. You don’t hear individual echoes. You hear spatial ambience that places you and your guitar in an acoustic environment.
The key difference?
Delay gives you distinct, countable repetitions. Reverb provides continuous atmospheric enhancement.

Why Guitarists Need Delay Effects
Delay transforms your guitar from a single voice into a musical conversation. It serves three essential musical functions that no other effect can provide.
- Rhythmic enhancement turns simple playing into complex patterns.
A dotted-eighth delay can make basic chord strumming sound like intricate fingerpicking, while slapback delay adds natural thickness that makes single notes cut through dense mixes without turning up the volume. - Spatial dimension creates the illusion of multiple guitars without actually recording additional parts.
Country guitarists use subtle delays to make their leads pop above steel guitar and fiddle, while ambient players layer multiple delay times to build evolving soundscapes from single notes. - Musical atmosphere establishes emotional context that serves the song’s message.
The floating delays on Pink Floyd’s “Shine On You Crazy Diamond” don’t just add echoes, but they create the vast, introspective space that makes David Gilmour’s guitar solos feel like emotional journeys rather than technical displays.

Understanding these core functions helps you move beyond “delay makes cool sounds” to “delay serves my music.” In the next section, we’ll explore exactly how different delay technologies create these effects and why the technical differences matter for your sound.
History of Guitar Delay Pedals
Before compact pedals sat on pedalboards, guitarists chased echo effects through studio trickery, modified amplifiers, and eventually dedicated machines that changed music forever. Understanding this evolution helps explain why modern delay pedals offer such different characters—and why some cost $50 while others command $500.
The technology that creates your delay repeats determines its sonic personality. Here’s how we got from room-sized tape machines to the sophisticated stompboxes available today.
Tape Echo Origins (1950s–1970s)
Guitar delay started with reel-to-reel tape machines that recorded your signal onto magnetic tape and played it back milliseconds later. The Maestro Echoplex and Roland Space Echo became legendary for their warm, organic repeats that seemed to breathe and move with your playing.
These weren’t pedals—they were furniture-sized machines with moving parts, spinning tape loops, and maintenance schedules that rivaled vintage sports cars. But guitarists tolerated the hassle because nothing else created those rich, textured echoes.

I gigged with a Space Echo in the 2000s and experienced this firsthand. The tone was absolutely magical. Warm repeats that sat perfectly in any mix, with natural wow and flutter that made every echo feel alive. But hauling that beast to gigs, dealing with tape replacements, and praying it wouldn’t break down mid-set? That part was considerably less magical.
Analog Delay (1970s–1980s)
The late ’70s brought salvation: compact analog delay pedals using bucket brigade device (BBD) technology.

These pedals passed your signal through chains of capacitors that naturally compressed and warmed each repeat. The degradation wasn’t a limitation. It was the whole point. Each echo got progressively darker and more musical, creating the vintage character that analog enthusiasts still chase today.
Boss released the DM-1 Delay Machine in 1978, bringing studio-quality delay to pedalboards for the first time. Suddenly, you could get lush, warm repeats without a roadie and a truck. The MXR Analog Delay and Electro-Harmonix Memory Man followed, cementing analog delay as essential gear for any serious guitarist.
Digital Delay Pedals (1980s–Today)
Digital delays changed everything by converting your signal to data, storing it in computer memory, and playing it back with mathematical precision.

Boss’s DD-2 in 1984 proved that digital processing could deliver pristine repeats, extended delay times, and rock-solid reliability in a compact stompbox. No tape to replace. No temperature drift. No BBD noise. Just clean, repeatable delays that sounded identical night after night.
Early digital delays caught criticism for sounding “cold” and “sterile” compared to analog warmth, and honestly, they deserved it. Those first-generation units were clinical in ways that didn’t serve music.
But modern digital delays have evolved dramatically. Today’s algorithms can recreate analog warmth, tape character, or pristine digital precision. Sometimes all in the same pedal. Units like the Strymon Timeline and Boss DD-500 offer vintage tape emulations so convincing that even experienced engineers struggle to distinguish them from actual tape machines in blind tests.
Understanding this evolution matters because it explains why delay pedals exist across such a wide price range with such different characteristics. You’re not just choosing features—you’re choosing which era of delay technology serves your music best.
How Guitar Delay Effects Work
Understanding how delay effects process your guitar signal helps you make the right decisions about which technology works best with your music and why certain settings create specific sounds.
Don’t worry. You don’t need an engineering degree.
But grasping the basics transforms delay from mysterious magic into a predictable, controllable musical tool.
Analog delay systems
Analog delays use Bucket Brigade Device (BBD) circuits that pass your guitar signal through chains of capacitors – like passing a bucket of water down a firefighter line. Each “bucket” holds your signal momentarily before passing it to the next stage.
This process naturally compresses your signal and filters out high frequencies with each transfer, creating the warm, musical character that analog delay enthusiasts prize.

BBD circuits sample your incoming audio thousands of times per second, and the clock noise from this sampling requires filtering, which contributes to analog delay’s characteristic high-frequency rolloff. The limited number of BBD stages restricts delay times to typically 600 milliseconds or less.
But this limitation often forces more musical applications.
Learn more about how analog delay works.
Digital delay systems
Digital delays convert your analog guitar signal to digital data, store that information in computer memory, and then convert it back to analog. This process can, in theory, reproduce your input signal perfectly – though quality depends on sampling rate and bit depth, the same factors that determine CD quality versus MP3 quality.
Digital processing enables almost unlimited delay times, multiple delay types through different algorithms, and precise parameter control impossible with analog circuits.
However, some players find digital delays too “perfect” and prefer analog’s natural signal degradation.

Hybrid approaches
Hybrid delays combine analog signal paths with digital processing, attempting to capture the best of both worlds. These systems might use analog circuitry for your dry signal path while using digital processing for delay generation, or analog filtering to warm up digital delay repeats.
Want to learn the difference between analog and digital delay? Our analog vs digital delay comparison breaks down the real sonic differences to help you choose the right technology.
Delay Pedal Controls and Their Ranges
Every delay pedal, regardless of technology, shares fundamental controls that shape your sound in predictable ways.

Delay Time
Delay Time determines the spacing between your original note and its first repeat, measured in milliseconds. This single parameter defines your delay’s musical character:
- 50-120ms: Slapback delay for natural thickening without obvious effect presence
- 200-500ms: Musical delays that enhance lead playing and create rhythmic patterns
- 600-800ms: Ambient delays that transform single notes into evolving textures
- 800ms+: Extended delays for experimental and atmospheric applications
Feedback (Regeneration)
Feedback controls how much of each delayed signal feeds back into the input, determining how many repeats you hear. Low feedback settings provide just a few clean repeats, while higher settings create long echo trails.
Push feedback too high and you’ll get runaway oscillation – sometimes musical, sometimes ear-splittingly painful.
Mix
Mix balances your dry guitar signal with the wet delayed signal. Most musical applications use 20-40% wet signal, providing enough delay presence without overwhelming your original playing. Higher mix levels work for ambient applications where the delay becomes the primary musical content.
Modulation
Modulation adds subtle pitch variations to delayed signals through chorus or vibrato effects. This prevents repeats from sounding artificially perfect and recreates the natural wow and flutter of vintage tape echo units. Modulation affects only the delayed signal, leaving your dry tone unchanged.
Filtering
Filtering shapes the frequency content of delay repeats through EQ or tone controls. High-frequency filtering creates warmer, darker repeats that sit better in busy mixes, while low-frequency filtering prevents muddy buildup when using multiple repeats.
Technical Comparison: Analog vs Digital vs Hybrid
| Characteristic | Analog | Digital | Hybrid |
|---|---|---|---|
| Signal Character | Warm, compressed, degrading | Clean, precise, consistent | Customizable blend |
| Delay Time Range | Limited (20-800ms) | Extended (minutes possible) | Variable by design |
| Noise Floor | Higher (BBD noise) | Lower (digital processing) | Optimized balance |
| Repeat Quality | Progressively warmer/darker | Identical to original | Programmable character |
| Self-Oscillation | Musical, organic | Controlled, precise | Best of both approaches |
| Power Requirements | Lower (20-50mA) | Higher (200-500mA) | Variable |
| Temperature Stability | Affected by heat/cold | Stable performance | Depends on architecture |
| Maintenance | Component aging | Firmware updates | Mixed considerations |
No type of delay is superior. They each serve different musical purposes.
Analog delays excel where warmth and musical character matter most, like vintage rock tones or subtle enhancement. Digital delays provide precision and flexibility essential for complex timing relationships or extended ambient applications. Hybrid systems attempt to optimize both characteristics but often involve compromises in cost or complexity.
Understanding these technical foundations empowers better decision-making when choosing delay pedals and optimizing their settings for your specific musical goals.
Types of Guitar Delay Effects
Choosing the right delay type can change your sound in ways that go far beyond simple echo effects. Each delay technology (or type) offers unique sounds that can be used for specific musical purposes, from subtle tone enhancement to obvious creative processing. If you can learn to understand these differences, it’ll help you start to match delay character to the sound you want rather than getting lost in endless options.
Analog Delay: Warmth and Musical Character
Analog delays use Bucket Brigade Device circuits that naturally compress and warm your signal with each repeat. This isn’t a limitation. It’s the musical magic that makes analog delays so sought after. Each repeat loses slight high-frequency content and gains gentle compression, creating repeats that complement your playing rather than competing with it.
The progressive degradation means your first repeat sounds almost identical to your original signal, the second repeat becomes slightly warmer, and subsequent repeats continue darkening until they blend seamlessly into the background. This natural filtering helps analog delays sit perfectly in dense mixes without frequency conflicts.
Key Characteristics: Natural compression on repeats, progressive high-frequency rolloff, limited delay times (typically 20-600ms), potential for musical self-oscillation, warm BBD character
Famous Examples: MXR Carbon Copy, Boss DM-2, Way Huge Aqua Puss
Best Applications: Vintage rock tones, lead guitar enhancement, rhythm guitar thickening, any situation where warmth matters more than precision.
Think of it this way:
Analog delays work best when you want the effect to enhance your playing’s natural character rather than creating obvious processing.

Digital Delay: Precision and Versatility
Digital delays convert your signal to digital data, which means they can create mathematically precise repeats with extended delay times and virtually no noise. This accuracy makes digital delays perfect when timing precision matters most, such as delays that must lock perfectly with your drummer or create specific rhythmic relationships.
Modern digital delays can either reproduce your signal with pristine clarity or they use algorithms to simulate analog warmth, tape character, or other creative processing. The versatility here makes digital delays the Swiss Army knives of delay effects.
Key Characteristics: Pristine, identical repeats, extended delay times (often several seconds), low noise floor, consistent performance, multiple delay types via algorithms, comprehensive parameter control
Famous Examples: Boss DD-500, Strymon Timeline, TC Electronic Flashback 2, Line 6 DL4 series
Best Applications: Lead guitar fills requiring precise timing, rhythmic enhancement synchronized to tempo, ambient applications needing long delay times, any situation requiring multiple delay types in one pedal.
Think of it this way:
Digital delays shine when flexibility and precision matter most.

Tape Delay: Vintage Character and Organic Movement
Tape delays are the original delay technology. They use actual tape loops or digital recreations of tape machine characteristics. The mechanical nature of tape creates wow and flutter (subtle pitch variations), tape saturation, and gradual high-frequency loss that’s impossible to achieve with other technologies.
Even modern digital tape delay emulations capture these organic imperfections, creating delays that feel alive and animated rather than static. The natural compression and saturation make tape delays incredibly musical, whether used subtly or pushed to obvious extremes.
Key Characteristics: Natural wow and flutter, tape saturation and compression, gradual high-frequency loss, vintage warmth, beautiful self-oscillation capabilities, organic movement
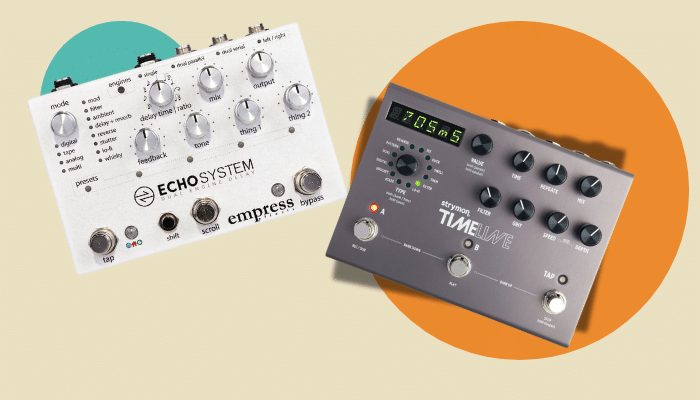
Famous Examples: Roland Space Echo RE-201, Echoplex EP-3, Strymon El Capistan, Boss RE-202 Space Echo, Empress Echosystem (tape algorithms)
Best Applications: Vintage-inspired tones across all genres, ambient soundscapes requiring organic movement, lead guitar that needs to sit perfectly in mixes, any situation where character matters more than technical perfection.
Think of it like this:
Tape delays excel at making repeats feel musical rather than mechanical.

Multi-Tap Delay: Complex Rhythmic Patterns
Multi-tap delays use multiple simultaneous delay lines with independent timing and level controls. Instead of simple repeats at regular intervals, you can create complex polyrhythmic patterns using different musical subdivisions simultaneously. For example, quarter notes, dotted eighths, and triplets all happening at once.
With a multi-tap delay, you can create sounds that are impossible with single-tap delays, from subtle rhythmic enhancement using closely spaced taps to obviously complex patterns that turn your simple guitar lines into intricate arrangements.
Key Characteristics: Multiple simultaneous delay lines, independent timing per tap, complex polyrhythmic possibilities, three-dimensional soundscapes, extensive parameter control
Famous Examples: TC Electronic 2290, Eventide TimeFactor, Boss DD-500 (multi-tap mode), Strymon Timeline (multi-tap algorithms)
Best Applications: Post-rock and ambient music requiring complex textures, studio applications where maximum control is needed, live performance situations requiring multiple delay characters simultaneously.
Think of it like this:
Multi-tap delays serve advanced players who want to use delay as a compositional tool.
Modulated Delay: Movement and Animation
Modulated delays add Low-Frequency Oscillation (LFO) movement to delayed signals through chorus, vibrato, or other modulation effects. Crucially, this modulation affects only the delayed signal, and leaves your dry tone completely unchanged for maximum clarity.
The subtle movement of modulation prevents repeats from sounding static and artificial. It adds organic animation that can make delays feel more natural and alive. This is particularly important in sparse arrangements where static repeats might sound too obviously processed.
Key Characteristics: LFO-driven movement on repeats only, organic and animated character, prevents static-sounding delays, maintains dry signal clarity, various modulation types available
Famous Examples: Boss DM-2W (Waza Craft with vibrato), Chase Bliss Tonal Recall, Empress Echosystem (modulated algorithms), Source Audio Nemesis
Best Applications: Ambient guitar where movement prevents stagnation, psychedelic and experimental music, any application where static delays feel too artificial.
The best way to think of it:
Modulated delays work best when you want obvious character and animation.
Reverse Delay: Psychedelic Anticipation
Reverse delays play delayed signals backwards. They’re great for creating anticipatory swells that build into your notes rather than following them. It creates a distinctive “breathing” quality that’s immediately recognizable and highly atmospheric.
Originally achieved by flipping tape reels backwards during recording, reverse delay is now easily to get through digital processing. Reverse delay works especially well with sustained notes and chords, creating dramatic build-ups that heighten musical tension.
Key Characteristics: Backwards playback of delayed signals, anticipatory swells building into notes, distinctive “breathing” quality, highly atmospheric, dramatic tension building
Famous Examples: TC Electronic Flashback 2 (reverse mode), Boss DD-7/DD-8 (reverse mode), Strymon Timeline (reverse algorithms), Chase Bliss Generation Loss
Best Applications: Psychedelic music, ambient soundscapes, dramatic entrance effects, creating anticipation and atmosphere, experimental and avant-garde applications.
To put it simply:
Reverse delays work best as special effects rather than constant processing.
Overall, each delay has its own specific musical purpose. And understanding the differences helps you choose delay effects that improve your music rather than fight against it. I’d recommend starting by learning two or three delay types rather than trying to master every variation available.
Iconic Delay Sounds in Music History
Some of the most influential guitar tones in rock history feature delay effects. These artists don’t just add echoes to their sound, but they transform and use delay as a compositional instrument. Their approaches demonstrate how delay can serve melody, rhythm, and atmosphere in ways that changed popular music forever.
The Edge (U2): Rhythmic Delay as Composition Tool

The Edge revolutionized delay by treating repeats as additional rhythm guitar parts rather than simple enhancement. His signature approach uses dotted-eighth note delays (typically 380-450ms at moderate tempos) that interweave with his playing to create cascading arpeggios from simple chord progressions.
Equipment Evolution
The Edge’s delay journey spans from early analog units like the Electro-Harmonix Memory Man to sophisticated digital processors including the Korg SDD-3000 and TC Electronic 2290. His current touring rig features multiple Strymon Timeline units for comprehensive delay control.
Revolutionary Technique
The Edge plays to the repeats rather than against them, creating interlocking rhythmic patterns impossible without delay. He often plays on the beat while letting delay fills provide off-beat content, essentially becoming a two-guitarist arrangement performed by one person.
Defining Songs
“Where the Streets Have No Name” showcases the classic dotted-eighth delay creating the iconic intro arpeggio pattern that builds from simple strumming into complex polyrhythmic textures. “With or Without You” demonstrates how delay transforms basic chord progressions into emotionally compelling soundscapes.
 7:13
7:13Musical Impact
The Edge proved that delay could be a compositional tool rather than a mere enhancement. He inspired countless post-punk and alternative rock guitarists to explore rhythmic delay applications more thoroughly. His approach made delay essential to modern rock guitar vocabulary.
David Gilmour (Pink Floyd): Melodic Delay Master

David Gilmour’s delay mastery focuses on melody and emotional expression. His approach treats delay as an extension of musical phrases, using repeats to develop and elaborate melodic ideas rather than create rhythmic patterns. This technique transforms guitar solos from technical displays into floating, emotional journeys.
Equipment Evolution
Gilmour’s delay evolution includes the legendary Binson Echorec (used on early Pink Floyd albums), various MXR Digital Delay units, and, later, the TC Electronic 2290. His approach often involves multiple delay units simultaneously, creating complex spatial effects.
Melodic Philosophy
Gilmour uses delay to extend and develop musical phrases, often playing simple melodies that become complex through interaction with delay repeats. He frequently feeds delays into reverbs for maximum spatial impact, placing his guitar in vast acoustic environments.
Defining Songs
“Time” features his delay-soaked lead tone with repeats that seem to float independently in the mix. “Shine On You Crazy Diamond” demonstrates how delay can extend melodic phrases beyond what’s physically playable, while “Comfortably Numb” shows delay feeding into reverb for epic spatial dimension.
 6:56
6:56Lasting Influence
Gilmour established delay as essential for emotional guitar expression, proving that effects could enhance rather than distract from musical content. His approach influenced progressive rock, ambient music, and any genre prioritizing atmosphere over technical prowess.
Scotty Moore (Elvis): Slapback Originator

Scotty Moore’s slapback delay work on Elvis Presley’s early recordings created the foundation of modern popular music guitar. Working with engineer Sam Phillips at Sun Records, Moore used the studio’s tape delay system to create the subtle thickening that made rockabilly guitar leap from speakers with unprecedented energy.
Pioneering Equipment
Moore’s sound came from the studio’s tape-based slapback delay system, later recreated with portable units like the Ray Butts Echosonic amplifier that combined amp and delay in one revolutionary package.
Foundational Technique
Moore’s slapback approach used short delay times (70-120ms) with single repeats, creating natural doubling without obvious effect presence. This technique made his guitar parts sound bigger and more present without competing with Elvis’s vocals.
Revolutionary Recordings
“That’s All Right” features the first prominent use of slapback delay in popular music, while “Mystery Train” demonstrates how slapback could enhance both rhythm and lead playing without overwhelming the arrangement.
 1:57
1:57Genre-Defining Impact
Moore’s slapback technique became essential to rockabilly, country, and early rock and roll. His approach proved that subtle effects could have massive musical impact, establishing delay as a fundamental tool for guitar enhancement rather than obvious processing.
Eddie Van Halen: Tape Delay Innovation

Eddie Van Halen transformed tape delay from subtle enhancement into a lead instrument, using an Echoplex EP-3 not just for echo effects but as a preamp and sustain enhancer. His approach demonstrated how delay units could improve core guitar tone while providing creative echo possibilities.
Essential Equipment
Van Halen’s Echoplex EP-3 served dual purposes—its preamp section provided crucial gain and compression while the tape delay created his signature echo effects. This unit became as important to his sound as his famous Frankenstein guitar.
Innovative Application
Van Halen used the Echoplex’s preamp to boost his Marshall amplifiers into singing sustain, while employing the delay for specific dramatic effects rather than constant processing. His approach showed how delay units could enhance fundamental guitar tone.
Showcase Performances
“Cathedral” features Van Halen using delay to create cathedral-like ambient swells, while “Eruption” demonstrates how delay can add drama to technical passages without interfering with precision playing.
 1:23
1:23Technical Influence
Van Halen proved that delay units could serve multiple functions beyond simple echo effects, inspiring guitarists to explore delay pedals as tone enhancers and creative processors. His approach influenced hard rock and metal players to incorporate delay without sacrificing aggression or clarity.
These legendary applications demonstrate delay’s evolution from a simple echo effect to a sophisticated musical instrument, inspiring countless musicians to explore delay’s creative possibilities beyond basic enhancement.
Guitar Delay Settings by Musical Genre
Understanding how different genres use delay effects enables you to apply these techniques appropriately to your own music. Each style prioritizes different aspects of delay—from invisible enhancement to obvious creative processing—and knowing these conventions helps you serve the song rather than overwhelm it.
Country & Rockabilly: Slapback Perfection
Country music built its guitar identity around slapback delay, that single, quick repeat that adds body without sounding like an obvious effect. This approach originated with early rockabilly recordings where engineers used tape delays to thicken performances without interfering with vocal clarity.
Example Settings
- 80-120ms delay time, single repeat (minimal feedback)
- 25-35% mix
- No modulation
Every pedal is different, use this as a starter and adjust until you get a sound you like.

Character Description
Slapback delay creates natural doubling that makes single notes and chord progressions sound fuller without timing conflicts. The effect should enhance your playing’s natural rhythm rather than competing with it.
Why It Works
Country arrangements often feature busy midrange content from steel guitar, fiddle, and vocals. Short slapback delays add presence without cluttering these frequency ranges. The single repeat prevents timing conflicts with fast passages common in country music, while the subtle mix level maintains the natural feel essential to authentic country guitar.
Application Tips
Use slapback on both rhythm and lead playing, but adjust mix levels based on your role in the arrangement. Lead fills can handle slightly higher delay levels (30-35%) while rhythm guitar should stay subtle (20-25%).
Want that classic rockabilly echo or vintage country twang? Learn how to set it up step by step in this guide: How to Create Slapback Delay.
Rock & Blues: Musical Enhancement
Rock and blues delay applications usually focus on enhancing emotional expression without overwhelming the music. These genres use delay to support sustain, add presence to lead lines, and create musical space between vocal phrases.
Lead Guitar Settings
- 200-400ms delay time
- 2-4 repeats (moderate feedback)
- 25-40% mix
- Occasional modulation for movement
Rhythm Enhancement
- 150-250ms delay time
- 1-2 repeats
- 20-30% mix
- Minimal modulation

Character Description
Rock delays should sound musical rather than obvious, supporting the natural character of your playing while adding complexity. The repeats should complement your phrases, not compete with them.
Example Setup
MXR Carbon Copy at 300ms delay time (quarter note at 120 BPM), feedback at 30% (2-3 repeats), mix at 35%. The analog warmth sits perfectly in rock mixes without frequency conflicts.
Why It Works
Rock arrangements provide more space for delay repeats than country music, allowing moderate delay times that create interesting rhythmic relationships. The 2-4 repeat range adds sustain to lead lines without muddying chord progressions, while the moderate mix levels maintain punch and clarity essential to rock guitar.
Genre Variations
Classic rock often uses shorter delays (200-300ms) for tight, punchy enhancement, while blues rock can accommodate longer delays (350-450ms) that add emotional space between phrases.
Post-Rock & Ambient: Extended Soundscapes
Post-rock and ambient music treat delay as a primary compositional tool rather than simple enhancement. These genres use extended delay times and high feedback settings to transform single notes into evolving musical textures.
Ambient Settings
- 600ms-2 seconds delay time
- High feedback (multiple repeats)
- 40-60% mix
- Extensive modulation and filtering

Layering Technique
Multiple delay pedals with different times (400ms + 900ms + 1.2 seconds) creating complex polyrhythmic patterns
Character Description
Ambient delays should create obvious, evolving textures that become part of the primary musical content. The delays often matter more than the notes being played.
Example Setup
Strymon Timeline with dual engines running 600ms and 900ms delays simultaneously, feedback at 70% each, mix at 50%, with shimmer reverb feeding the delay outputs for ethereal harmonic enhancement.
Why It Works
Post-rock arrangements provide extensive space for delay development, often featuring sparse instrumentation that leaves room for complex echo patterns. High mix levels make delay an obvious compositional element, while long delay times enable the evolving textures essential to ambient soundscapes.
Advanced Techniques
Use expression pedals to morph delay times during performance, creating pitch-bending effects as delay times change. Layer multiple delay types (analog + digital + tape) for complex character interactions.
Metal & Hard Rock: Precision and Clarity
Metal requires careful delay application to maintain the precision and aggression essential to the genre. High-gain amplification amplifies timing issues, making precise settings crucial for preserving rhythmic clarity.
Essential Settings
- 100-200ms delay time
- 1-2 repeats (low feedback)
- 15-25% mix
- Minimal modulation

Character Description
Metal delays should enhance power without creating muddiness. Short delay times prevent timing conflicts with fast alternate picking, while low mix levels maintain the dry signal aggression.
Example Setup
Boss DD-8 at 150ms delay time, feedback at 20% (single repeat), mix at 20%. The clean digital repeats maintain clarity essential for metal precision.
Why It Works
Metal’s high-gain tones and fast playing demand delays that enhance without interfering. Short delay times avoid conflicts with palm-muted riffs and rapid alternate picking, while low feedback prevents echo buildup that would muddy complex arrangements. The subtle mix levels add presence without sacrificing the dry signal punch that defines metal guitar.
Application Strategy
Use delay primarily on lead guitar solos rather than rhythm sections. During rhythm playing, either bypass delay completely or use extremely subtle settings (10-15% mix) for slight thickening without timing issues.
Surf Music: Reverb Integration
Surf music combines delay with spring reverb to create the characteristic “wet” guitar tone that evokes oceanic themes. The delay serves the spring reverb rather than standing alone.
Essential Settings
- 200-350ms delay time
- 2-3 repeats
- 30-40% mix
- Combine with heavy spring reverb (60-80% mix)

Character Description
Surf delays should support the spring reverb’s splashy character while adding rhythmic enhancement. The combination creates the dripping, oceanic ambience that defines surf guitar.
Example Setup
TC Electronic Flashback 2 at 250ms delay time, feedback at 35%, mix at 35%, feeding into a spring reverb pedal or amp with spring reverb cranked to maximum usable levels.
Why It Works
Surf music’s relatively simple chord progressions and moderate tempos allow for the use of delay and reverb without arrangement conflicts. The delay adds rhythmic interest while the spring reverb provides the essential “drip” character. Together, they create the three-dimensional wetness that transforms simple power chords into evocative oceanic soundscapes.
Performance Technique
Control spring reverb intensity through picking dynamics rather than knob adjustments, using aggressive attacks to create the characteristic spring crashes that accent important beats.
Understanding these genre conventions provides starting points for your own exploration while explaining why certain approaches work better in specific musical contexts. The best delay settings always serve the song’s needs rather than showcasing the effect itself.
Best Guitar Delay Pedals by Budget
The modern delay pedal market offers exceptional quality across every price range, from budget champions that rival boutique units to premium processors that define professional standards. Understanding the value propositions at each price tier helps you invest wisely, whether you’re starting your delay journey or upgrading to professional-grade equipment.
Budget Champions ($30-150): Professional Quality Within Reach
Top Pick: TC Electronic Echobrain ($40-50)

The Echobrain delivers analog-style warmth and character that rivals pedals costing three times as much. Its simple three-knob interface focuses on musical essentials—time, feedback, and level—without overwhelming beginners with complex features.
Why It Wins: Professional analog warmth, infinite oscillation capability for experimental sounds, rock-solid construction, and a price point that makes it accessible to any guitarist. The sound quality genuinely competes with boutique analog delays.
Best For: Vintage rock tones, country slapback, experimental ambient sounds, anyone wanting authentic analog character without premium pricing.
Limitations: Single delay type only, limited maximum delay time (around 600ms), no tap tempo or presets.
Runner-up: Boss DD-3T ($129)

Boss’s legendary reliability meets essential digital delay functionality in the DD-3T. The tap tempo feature allows precise synchronization with any song, while the clean digital repeats work perfectly for rhythmic applications across all genres.
Why It Works: Bulletproof reliability, tap tempo for perfect timing, clean digital character ideal for precise applications, decades of proven performance in professional situations.
Best For: Beginners learning delay fundamentals, backup pedal for touring, clean digital applications, anyone prioritizing reliability over character.
Used By: Countless touring professionals as backup units, weekend warriors, and students building their first pedalboards.
Mid-Range Excellence ($150-300): The Sweet Spot
Industry Standard: MXR Carbon Copy ($169)

The Carbon Copy has become the industry benchmark for analog delay, appearing on professional pedalboards worldwide. Its warm BBD tone and simple interface make it the go-to choice for players wanting classic analog character without complexity.
Why Professionals Choose It: Authentic BBD warmth that sits perfectly in any mix, touring-grade reliability, internal modulation controls for subtle animation, and widespread professional adoption that proves its worth.
Best For: Studio recording, live performance, vintage character applications, players wanting the “desert island” analog delay that does everything well.
Used By: Touring artists across genres who need reliable analog warmth that works in any musical context.
Versatile Champion: Boss DD-8 ($159-180)

Eleven delay modes in a compact package make the DD-8 perfect for players wanting multiple delay types without multiple pedals. Stereo I/O and comprehensive parameter control provide professional functionality at mid-range pricing.
Why It’s Essential: Multiple delay types (analog, digital, tape, reverse, etc.), stereo capabilities, compact design that saves pedalboard space, Boss reliability, and comprehensive control over delay parameters.
Best For: Players needing multiple delay sounds for different songs, stereo rig applications, compact pedalboards requiring versatility, anyone wanting to explore different delay types affordably.
Multi-Mode Innovation: TC Electronic Flashback 2 ($169-190)

The Flashback 2’s MASH technology and TonePrint capability provide boutique-level functionality at mid-range pricing. Pressure-sensitive footswitches enable real-time parameter control, while TonePrint allows custom algorithm loading.
Why It Stands Out: MASH pressure-sensitive control, TonePrint custom algorithms, multiple delay types, stereo operation, and innovative features typically found in premium pedals.
Best For: Players wanting cutting-edge features, real-time parameter control, custom algorithm exploration, modern functionality at traditional pricing.
Premium Powerhouses ($300-600): Professional Benchmarks
Professional Standard: Strymon Timeline ($449-499)

The Timeline represents the current pinnacle of delay pedal technology, offering twelve different delay machines with extensive parameter control and pristine sound quality that equals or exceeds studio processors.
Why It Dominates: Industry-leading algorithms, 200 preset capacity, comprehensive MIDI implementation, studio-quality sound across all delay types, and the professional credibility that makes it a universal standard.
Best For: Professional recording, touring applications requiring multiple delay sounds, studio work, players demanding the absolute best in delay technology.
Investment Value: Holds resale value better than most pedals due to professional adoption and continued relevance in evolving music production.
Dual-Engine Revolutionary: Empress Echosystem ($449-499)

The Echosystem’s true dual-engine architecture enables simultaneous operation of any two of 36+ algorithms, fundamentally changing how guitarists approach delay as a compositional tool rather than simple effect.
Why It’s Revolutionary: True dual engines running simultaneously, 36+ algorithms including unique processors, flexible series/parallel/stereo routing, comprehensive preset system, and sound quality that rivals dedicated studio processors.
Best For: Advanced players exploring delay as compositional tool, studio applications requiring maximum flexibility, sound designers, players wanting cutting-edge delay technology.
Creative Potential: Opens previously impossible sonic territories through dual-engine processing and advanced routing options.
Feature-Rich Option: Line 6 DL4 MkII ($299-349)

Thirty delay sounds plus reverbs and dual loopers provide comprehensive functionality for live performance and creative exploration. The large-format interface enables immediate access to essential parameters without menu diving.
Why It Works: Extensive delay library, dual independent loopers (240 seconds total), reverb integration, simple interface for live performance, and proven track record from the original DL4’s widespread adoption.
Best For: Live performers needing multiple delay sounds, loopers for creative performance, players wanting comprehensive delay exploration, anyone requiring the functionality of multiple pedals in one unit.
Vintage Investment ($1,500-4,000): Collector Territory
Holy Grail: Roland Space Echo RE-201 ($2,500-4,000)

Working Space Echo units command premium prices due to their legendary status and irreplaceable tape character. These units defined delay for generations of musicians and continue appreciating as functional vintage instruments.
Why Collectors Pay: Authentic tape character impossible to replicate perfectly, historical significance, continued appreciation as investments, unique maintenance ritual that some players cherish.
Modern Alternative: Boss RE-202 Space Echo ($299-349) captures 90-95% of the vintage character without maintenance requirements, representing superior value for working musicians.
Investment Consideration: Vintage Space Echoes require ongoing maintenance and may not be practical for regular use, making them better suited for collectors or special recording applications.
Echoplex EP-3 ($1,500-2,500)

The preamp section that gave Eddie Van Halen’s tone its singing sustain, combined with distinctive tape delay character, makes working EP-3 units highly sought after by vintage tone enthusiasts.
Character Value: Unique preamp coloration that enhances base guitar tone, tape delay character distinct from Space Echo, and historical significance in rock guitar evolution.
Practical Reality: Modern alternatives like the Catalinbread Echorec or Strymon El Capistan provide similar character with contemporary reliability and features.
Buying Strategy Recommendations
Start with something proven and practical. Pedals like the MXR Carbon Copy or Boss DD-8 give you professional-quality delay without the premium price tag. These workhorses handle most musical situations while teaching you what actually matters in your delay sound.
Here’s the thing about upgrading: wait until you know exactly what you need.
Once you understand which delay characteristics genuinely impact your playing – and you can justify the cost through regular use or specific creative goals – that’s when premium units make sense.
As for vintage delays? Only go there if you’re collecting, chasing a specific tone modern pedals can’t nail, or treating them as investments rather than gigging tools.
The best delay pedal isn’t the most expensive one or the one with the most features.
It’s the one that serves your music effectively within your budget.
Signal Chain Placement & Setup
Getting your delay pedal placement right transforms it from a potential tone-wrecker into something that actually enhances your sound. Understanding signal chain placement and proper power keeps common problems at bay while delivering musical results.
Standard Signal Chain Position
The traditional signal chain follows a logical progression that works for most musical situations:
Guitar → (Tuner) → (Wah) → Gain Pedals → Amp Input
Amp Effects Send → Modulation → Delay → Reverb → Amp Effects Return

This puts delay after your distortion but before reverb. Creating the most natural and musical results. Your delay processes the core tone you’ve already shaped, while reverb places both your dry signal and delay repeats in the same acoustic space.
Running a clean amp without an effects loop? The simplified chain works perfectly:
Guitar → (Tuner) → (Compressor) → Overdrive → Modulation → Delay → (Reverb) → Amp Input

This treats your entire signal path as “pre-amp” processing, which is exactly what you want when you’re not using amplifier distortion.
Not sure whether your pedals should go before the amp or into the effects loop? Explore the full guide: Effects Loop vs Front of Amp: Where Do Your Pedals Belong?
Effects Loop Integration: Why It Matters
Effects loops give you a real advantage for delay placement. They sit after your preamp distortion but before the power amp. This positioning stops your amp’s distortion from mangling your delay processing, keeping things clear and defined like they should be.
Without an effects loop, high-gain amp settings turn your delay repeats into mud. The distortion hits both your original signal and the delay returns at the same time, creating frequency conflicts and timing issues that make everything sound unclear and unprofessional.
Alternative Routing Options
Parallel processing splits your signal to multiple effects at once rather than chaining them in series. This stops effects from stepping on each other while enabling complex layered sounds. You’ll need mixer pedals or amps with multiple effects loops, but the control over your processed sounds is worth it.
Pre-Drive Delay Placement
Putting delay before your overdrive pedals creates vintage rock tones where distortion hits the delay repeats. This generates compressed, saturated repeats that blend seamlessly with distorted rhythm playing – perfect for classic rock applications.
It’s not the “textbook” approach, but it works for specific sounds.
Stereo Considerations
Stereo matters when you’re running ping-pong delays or stereo modulation. These effects need stereo amplification or recording setups for full impact.
That said, they still provide some benefit in mono through phase interactions. Just don’t expect the full spatial experience.
Power Supply Requirements and Recommendations
Analog delays are easy. They typically pull 20-50mA, making them compatible with most power supplies. You can run multiple analog delays without breaking a sweat.
Digital delays are a different story.
They demand significantly more power, usually 200-500mA, with premium units like the Strymon Timeline needing up to 300mA. High-end digital processors often need dedicated power supply outputs to prevent voltage sag and performance issues.
Learn how to properly power your delay pedal in How to Power Guitar Pedals.
Advanced Delay Techniques
Beyond basic echo enhancement lies a world of creative delay applications that transform these effects into expressive instruments capable of sounds impossible through traditional guitar techniques alone. These advanced approaches require experimentation and musical judgment, but they unlock sonic territories that can define your creative voice.
Self-Oscillation Control: Managing Musical Chaos
Self-oscillation occurs when delay feedback reaches the threshold where the effect generates continuous tones even without input signal. While often avoided, controlled self-oscillation creates powerful musical effects ranging from ambient drones to percussive swooshes that punctuate song transitions.
Technique Development:
Start with your delay feedback at moderate levels (around 50%), then gradually increase while playing sustained notes. Listen for the point where repeats begin building rather than decaying—this is your oscillation threshold. Practice bringing feedback to this point temporarily, creating dramatic swooshes and buildups.
MXR Carbon Copy Example:
Set delay time to 350ms, slowly increase regeneration from 2 o’clock toward maximum. At approximately 3:30 on the regeneration control, you’ll reach the oscillation threshold. Practice using this position for dramatic effects, then backing off for normal operation.
Safety Considerations:
Self-oscillation can produce extremely loud signals that may damage speakers or hearing. Always have volume controls accessible when experimenting with high feedback settings. Use limiters or compressors after feedback-prone effects to prevent dangerous level spikes.
Musical Applications:
Create anticipatory swells building into new song sections, add excitement to guitar solos through controlled chaos, or generate ambient drones for atmospheric interludes. The key is musical restraint—use these techniques as accents rather than constant effects.
Take your delay pedal skills to the next level with advanced techniques in How to Use a Delay Pedal: 5 Pro-Level Techniques.
Expression Pedal Integration: Real-Time Parameter Control
Expression pedal control enables real-time morphing between different effect settings, creating dynamic changes impossible with static knob positions. Most modern delay pedals offer expression pedal inputs that can control multiple parameters simultaneously.
Popular Applications:
Morph delay time from short slapback to long ambient during guitar solos, sweep delay feedback for organic buildup and release effects, or control mix levels to bring delays in and out dynamically during performance.
Recommended Expression Pedals:
Mission Engineering EP1-KP provides smooth, reliable control with customizable resistance curves perfect for different parameter responses. Boss EV-30 offers similar functionality with proven durability for touring applications.

Programming Strategy:
Start with single-parameter control (delay time or feedback) before attempting multiple-parameter morphing. Practice smooth pedal movements that serve musical phrases rather than random parameter sweeping.
Creative Routing:
Some advanced pedals allow expression control over routing configurations, enabling real-time switching between series and parallel delay engines or morphing between different delay types mid-performance.
Dual Delay Setups: Series and Parallel Configurations
Series configuration places two delays in sequence, creating complex interactions between different delay times and characters. This approach enables polyrhythmic patterns impossible with single delays while layering different sonic characteristics.
Series Example:
Analog delay (300ms, warm character) feeding digital delay (450ms, clean repeats) creates both immediate warmth and extended precision. The analog delay provides musical character while the digital delay extends the ambient tail.
Parallel configuration sends your signal to two delays simultaneously using ABY switches or signal splitters, preventing interaction between effects while enabling character blending. Mix the returns at different levels to balance analog warmth with digital precision.
Parallel Setup:
Split your signal to MXR Carbon Copy (analog warmth) and Boss DD-500 (digital versatility) running simultaneously. Pan them slightly left and right for stereo width, or blend them equally for complex mono character.
Advanced Routing Options:
Use pedals like the Boss LS-2 Line Selector or Chase Bliss Junction Box for sophisticated A/B/Y switching with independent level controls. These units enable real-time switching between series, parallel, or individual delay configurations.
Musical Applications:
Post-rock and ambient music benefit from complex delay interactions that create evolving textures. Progressive rock uses polyrhythmic delay patterns for compositional complexity. Studio applications layer multiple delay characters for unique signature sounds.
Looping Integration: Modern Delay/Looper Combinations
Modern delay pedals increasingly incorporate looping functionality, transforming them from simple echo effects into comprehensive performance tools. These combinations enable live layering, songwriting assistance, and creative sound exploration.
Performance Applications:
Record rhythm loops with delay processing for ambient textures, layer delayed lead lines over existing loops, or use delay to process existing loop content in real-time for evolving soundscapes.
Creative Techniques:
Record short phrases into the looper, then use delay to create polyrhythmic interactions with the looped content. Experiment with delay feedback feeding into loop recording for self-generating musical content.
Synchronization Benefits:
Integrated delay/looper units maintain perfect timing relationships between delay repeats and loop boundaries, enabling complex musical constructions that would drift apart with separate units.
These advanced techniques transform delay from simple enhancement into creative instruments that expand your musical vocabulary beyond traditional guitar capabilities. Experimentation and musical judgment determine which techniques serve your creative vision while avoiding complexity for its own sake.
Recording with Delay Effects
Recording with delay effects requires different strategies than live performance, offering both additional creative possibilities and unique technical challenges. Understanding professional recording approaches helps you capture delay effects that enhance your recordings rather than creating problems during mixing and production.

Professional Studio Techniques
Dry signal recording provides maximum flexibility during mixing by capturing your unprocessed guitar signal alongside any effected versions. This approach enables delay level adjustments, effect type changes, and complete re-processing after tracking without requiring additional recording sessions.
Professional workflow:
Record your guitar through your delay pedal to one track while simultaneously capturing the dry signal (before effects) to another track. Use DI boxes or audio interfaces with multiple inputs to split your signal, ensuring both versions maintain optimal recording levels.
Re-amping approaches combine hardware character with digital flexibility by recording dry signals, then processing them through delay pedals during mixdown. This technique provides the analog warmth and character of hardware delays while maintaining complete control over delay parameters after recording.
Re-amping setup:
Play back your recorded dry guitar through your delay pedal chain, then record the processed result to new tracks. This method enables multiple delay treatments of the same performance, experimenting with different delay types and settings without re-recording guitar parts.
Parallel processing in mixing maintains clarity while adding complexity by mixing delayed and dry signals independently. Send your guitar track to auxiliary delay returns with separate level, EQ, and processing control, preventing delay from overwhelming the dry signal while enabling precise effect balance.
Advanced parallel techniques:
Use different delay times on separate auxiliary sends (quarter notes on one send, dotted eighths on another) for complex polyrhythmic patterns. Apply EQ to delay returns independently—high-pass filtering around 200Hz prevents muddy low-frequency buildup while gentle high-frequency reduction helps delays sit naturally in dense mixes.
Home Recording Setup Considerations
Audio interface requirements for professional delay recording include 24-bit/96kHz capability for maximum sound quality, low-latency monitoring for real-time playing comfort, and sufficient inputs for simultaneous dry and wet signal capture. Multiple outputs enable re-amping workflows essential for hybrid recording approaches.
Recommended interfaces:
- Focusrite Scarlett series: Reliable performance and adequate features for home recording at budget-friendly prices
- Universal Audio Apollo interfaces: High-end conversion with built-in processing that complements hardware delay pedals
Hybrid workflows combine hardware and software strengths by recording both dry and wet signals simultaneously. Use your delay pedal for character and inspiration during tracking, while the dry signal enables additional processing flexibility using software delays during mixing.
Monitoring considerations:
Use direct monitoring when recording with delay effects to prevent latency issues that interfere with timing. High-quality studio monitors or headphones reveal the full spatial impact of stereo delays and reverb combinations that consumer speakers might not reproduce accurately.
Hardware/Software Integration
Software delay integration complements hardware pedals through plugins that provide different characteristics or extended capabilities. Modern delay plugins often exceed hardware pedal functionality while offering automation and recall impossible with physical units.
Essential software recommendations:
- Valhalla Delay: Exceptional sound quality with extensive modulation capabilities at affordable pricing
- Soundtoys EchoBoy: Classic delay unit modeling with modern flexibility
- FabFilter Timeless 3: Creative delay effects with pristine sound quality and intuitive interface design
DAW integration strategies:
Use hardware delays for tracking inspiration and character, then supplement with software delays for precision timing, extended parameters, or creative effects impossible with hardware. Automation enables dynamic delay level changes throughout songs—increasing reverb during choruses, decreasing delay during busy sections, or automating effect bypassing for dramatic dynamic changes.
Frequency management in mixing:
Use EQ on delay returns to prevent conflicts with other instruments. High-pass filtering removes unnecessary low frequencies from delay tails, while gentle high-frequency reduction makes delays sit more naturally in dense mixes without harshness.
Stereo imaging techniques:
Pan delayed signals strategically to create width without interfering with centered elements like vocals and drums. Use different delay times on left and right channels for ping-pong effects, or employ subtle delay time differences for natural stereo width.
Professional mixing approach:
Treat delay as a mix element rather than just a guitar effect. Delay levels, frequency content, and spatial placement should serve the overall arrangement, sometimes requiring delay settings that differ significantly from live performance applications.
Understanding these recording-specific techniques enables you to capture delay effects that enhance your recordings professionally while providing the flexibility essential for modern music production workflows.
Delay Myths & Misconceptions Debunked
Despite decades of delay pedal evolution, persistent myths continue misleading guitarists and limiting their creative choices. These misconceptions often stem from outdated information or marketing hyperbole rather than musical reality. Understanding the facts helps you make decisions based on what actually serves your music.
Myth 1: “Digital Delay Sounds Sterile and Lifeless”
Modern digital delay algorithms capture analog character so convincingly that experienced engineers struggle to distinguish them in blind tests. Digital processing has advanced dramatically since the harsh, clinical delays of the 1980s that created this reputation.
Specific Examples:
Strymon’s dTape algorithm models tape delay characteristics including wow, flutter, and saturation with stunning accuracy. Boss’s WAZA Craft series combines digital precision with analog-style warmth. The TC Electronic Flashback 2’s TonePrint technology enables custom algorithms that span from pristine digital to convincingly vintage analog character.
Why The Myth Persists:
Early digital delays from the 1980s were indeed clinical and harsh compared to analog alternatives. Marketing from analog pedal manufacturers often emphasizes “warmth” versus “digital coldness” without acknowledging modern algorithm sophistication.
The Truth:
Choose delay technology based on your specific musical needs rather than general technology assumptions. Digital delays excel when precision timing matters, while analog delays provide natural character when warmth and compression serve your music better.
Myth 2: “You Need Expensive Delays for Professional Results”
Budget delays like the TC Electronic Echobrain ($45-50) deliver professional analog warmth used by touring musicians. Many successful recordings feature affordable delays that sound indistinguishable from boutique units in final mixes.
Professional Examples:
The Boss DD-3 has appeared on countless professional recordings despite its modest price point. Weekend warriors and touring professionals often rely on the same budget-friendly delays, proving that musical application matters more than price tags.
Why The Myth Persists:
Expensive pedals often provide more features, better build quality, and prestigious brand associations. Marketing emphasizes premium components and boutique manufacturing, implying superior sound quality that may not translate to audible differences in musical contexts.
The Truth:
Budget delays can absolutely deliver professional results when chosen appropriately for your musical style. Expensive delays justify their cost through additional features, build quality, and comprehensive functionality rather than inherently superior basic delay sounds.
Myth 3: “Analog Is Always Better Than Digital”
Each technology excels in different applications, and neither is universally superior. Analog delays provide natural compression and warmth perfect for vintage tones, while digital delays offer precision timing and extended capabilities essential for complex musical applications.
When Analog Excels:
Vintage rock tones, lead guitar enhancement, rhythm guitar thickening, and situations where natural character and compression improve the musical result. The BBD limitations often force more musical applications.
When Digital Excels:
Precise timing relationships, extended delay times for ambient applications, multiple delay types in one pedal, and situations requiring consistent performance regardless of temperature or component aging.
Why The Myth Persists:
Analog delay marketing emphasizes “warmth” and “musical character” while positioning digital as “cold” and “artificial.” Vintage recording associations create romantic attachments to analog technology that may not reflect modern musical needs.
The Truth:
Professional guitarists choose delay technology based on specific musical requirements rather than ideological preferences. Many professionals use both analog and digital delays for different musical contexts, recognizing that each technology serves distinct purposes.
Maintenance & Troubleshooting
Proper delay pedal maintenance prevents performance issues while protecting your investment. Understanding common problems and their solutions keeps your effects performing optimally and helps you avoid costly repairs or replacements.
Common Issues and Their Causes
Noise problems typically stem from power supply issues, poor cable connections, or environmental interference. Hum, buzz, and digital artifacts often indicate inadequate power isolation or ground loop problems between connected equipment.
Timing drift in analog delays occurs when temperature changes affect BBD circuits, causing delay times to shift slightly during performance. This is normal behavior for analog circuits, though extreme temperature variations can make timing changes noticeable enough to require adjustment.
Digital artifacts including dropouts, glitches, or distortion usually indicate insufficient power supply current, poor connections, or firmware issues in digital delays. These problems often appear intermittently, making diagnosis challenging without systematic troubleshooting.
Keep your tone clear and your gear in top shape with How to Clean Guitar Pedals.
Future of Guitar Delay Technology
The guitar delay effects landscape continues evolving rapidly, driven by technological advances and changing musical creation methods. Understanding emerging trends helps guitarists prepare for new creative possibilities while manufacturers push boundaries beyond traditional echo effects.
Emerging Technological Innovations
AI and machine learning applications represent the most exciting frontier in delay technology. Adaptive processing systems that learn user preferences and automatically adjust parameters based on playing style could revolutionize real-time performance applications. Predictive modeling algorithms might anticipate delay needs based on musical context, automatically switching between subtle enhancement and obvious creative processing.
Sustainable manufacturing has become an industry priority as environmental consciousness grows among musicians. Manufacturers increasingly explore alternative materials to rare woods and metals, adopt water-based finishes, and implement renewable energy sources in production. Local sourcing reduces carbon footprints while reforestation partnerships demonstrate genuine environmental commitment beyond marketing claims.
Cloud connectivity integration addresses the growing need for remote music creation and collaboration. Hardware trends include MIDI over network capabilities, USB-C connectivity for faster data transfer, and cloud preset storage enabling seamless sharing between devices and locations.
Market Evolution Patterns
Dual-engine systems are becoming the new standard in premium delay pedals, following pioneers like Empress Effects and Strymon. This architecture enables simultaneous operation of multiple algorithms with independent controls, transforming single pedals into comprehensive delay workstations capable of previously impossible routing configurations.
App integration has evolved from novelty to necessity across mid-range to premium pedals. Mobile control platforms like Source Audio’s Neuro ecosystem and Chase Bliss’s BLIP interface provide comprehensive parameter access, preset management, and firmware updates that extend pedal capabilities long after purchase.
Advanced MIDI implementation now includes full parameter control, 128+ preset access, and seamless DAW synchronization across professional-grade units. This integration enables studio automation and live performance capabilities that blur the lines between hardware effects and software processing.
Technology Predictions (Next 3-5 Years)
Streaming platform integration will likely enable real-time collaboration with ultra-low latency networking built into delay pedals. Musicians could process collaborators’ signals through their hardware effects during remote recording sessions, maintaining analog character while working globally.
Modular integration expansion may bridge guitar effects with Eurorack synthesis, enabling complex signal routing and processing combinations that serve both traditional guitar applications and experimental sound design.
Artificial intelligence refinement could produce delays that respond intelligently to musical context, automatically adjusting timing, feedback, and character based on tempo, key, and arrangement density without manual programming.
The future promises delay effects that serve creativity more intuitively while maintaining the musical character and reliability that make hardware delays essential to guitar expression. These advances will expand creative possibilities rather than replacing the fundamental musical functions that have made delay effects indispensable for over seventy years.
Conclusion: Finding Your Delay Voice
The journey through guitar delay effects reveals these devices as far more than simple echo machines – they’re creative instruments that have shaped popular music for over seven decades. From Elvis’s subtle slapback that launched rockabilly to The Edge’s rhythmic cascades that defined stadium rock, delay effects transform guitars from single voices into complex musical conversations.
Understanding the technical foundations, recognizing the sonic characteristics of different delay types, and learning genre-specific applications provides the knowledge foundation. But your unique delay voice emerges through experimentation, musical application, and the patience to discover which effects serve your creative vision rather than merely impressing listeners with obvious processing.
Your Starting Path Forward
Beginner guitarists should start with proven, affordable options that teach delay fundamentals without overwhelming complexity. The TC Electronic Echobrain ($45-50) provides authentic analog warmth for vintage applications, while the Boss DD-3T ($129) offers reliable digital precision with tap tempo for learning timing relationships.
Intermediate players ready to upgrade benefit most from industry-standard units that provide professional quality without premium pricing. The MXR Carbon Copy ($169) delivers the analog character that appears on countless professional recordings, while the Boss DD-8 ($159-180) provides multiple delay types for exploring different applications within a single pedal.
Professional applications justify investing in comprehensive delay workstations that provide studio-quality processing and extensive creative capabilities. The Strymon Timeline ($449-499) represents the current industry benchmark, while the Empress Echosystem ($449-499) offers revolutionary dual-engine architecture for advanced sonic exploration.
Guiding Principles for Delay Mastery
Musical context determines every decision. The “best” delay settings serve your song’s needs rather than showcasing technical capabilities. Sometimes subtle slapback enhancement serves music better than obvious ambient processing.
Experimentation reveals personal preferences that no guide can predict. Spend time with each delay type – analog warmth, digital precision, tape character – to understand which characteristics resonate with your musical goals. Rules provide starting points, but your ears make final decisions.
Technology serves creativity, not vice versa. Whether you choose budget-friendly pedals or premium processors, focus on how delay effects enhance your musical expression rather than getting lost in features for their own sake.
The most expensive delay pedal won’t improve your music if it doesn’t match your creative needs.
The Creative Instrument Awaits
Delay effects offer infinite creative possibilities limited only by your imagination and musical sensitivity. Your delay voice will develop through patient exploration, musical application, and the courage to experiment beyond conventional approaches.
The legendary delay sounds that inspired this guide resulted from artists who understood their tools deeply and used them to serve specific musical visions.
Armed with the knowledge from this guide, you’re prepared to explore confidently, make informed decisions, and discover the delay techniques that will define your unique musical voice.
FAQs About Guitar Delay Pedals
Should delay pedals go before or after overdrive and distortion?
Put your delay after overdrive and distortion pedals. When delay sits before gain, each repeat gets distorted again, creating muddy chaos. Delay after distortion means your notes get distorted once, then delayed cleanly. The repeats stay clear and musical. If your amp has an effects loop, use it to keep delay after your preamp’s gain stage.
What’s the difference between analog and digital delay pedals?
Analog delays use bucket brigade chips that naturally warm up your signal. Each repeat gets progressively darker and more compressed. Digital delays create precise repeats that sound identical to your input, staying bright and clear. Neither is better. Analog excels for vintage character and warmth. Digital wins for precise timing and extended delay times.
Learn the complete technical and tonal differences in our article Analog vs Digital Delay Pedals.
What’s the difference between a delay pedal and a looper pedal?
Delay creates rhythmic echoes measured in milliseconds. You play a note, it repeats back a few times, then fades away. A looper records several seconds of your playing and plays that entire recording back continuously in a perfect loop. Delay enhances individual notes. A looper captures complete musical ideas for building layered arrangements.
How much should I spend on a delay pedal?
Start with proven options in the $150-200 range, like the MXR Carbon Copy or Boss DD-8. Budget delays ($30-150), such as the TC Electronic Echobrain, deliver professional quality for most situations. Premium pedals ($300-600) like the Strymon Timeline justify their cost through studio-quality processing and extensive features, but only invest here when you know exactly what your music needs.
Can you use slapback delay with distortion?
Absolutely. Set your delay time between 80-120ms with a single repeat and 25-35% mix level. Keep it subtle enough to enhance without creating obvious echoes. For country and rockabilly, slapback adds natural thickness. With distortion, it gives body to power chords and makes riffs cut through. Just place the delay after your distortion pedal to avoid muddiness.
Do I need an effects loop for my delay pedal?
You need an effects loop if you’re using your amp’s preamp for distortion. Without one, your amp distorts both your dry signal and delay repeats together, creating muddy chaos. The effects loop places delay after the preamp’s gain stage but before the power amp. Running a clean amp with pedal-based gain? You don’t need an effects loop. Just place delay after your gain pedals.
What delay settings should beginners start with?
Start with quarter-note delay: 300-400ms delay time, 2-3 repeats (around 30% feedback), and 25-35% mix. This creates musical enhancement without overwhelming your playing. Once comfortable, try dotted-eighth delay (380-450ms) for rhythmic patterns, or slapback (80-120ms, single repeat) for natural thickening. Focus on how delay serves your music rather than showcasing the effect itself.
